Intro to Tuned Percussion
Seems we’re developing something of a series!
Following on from last month’s post about timpani, a colleague asked me to do a deep dive into tuned percussion. All too frequently school teachers are asked to run curriculum units on percussion with it being assumed they know the ins and outs of these instruments. Which is a bit unfair given that I’ve spent 18 years specialising in the subject and am still figuring things out!
So today I’d like to provide an introduction to all things tuned percussion – enjoy!
What is Tuned Percussion?
The term tuned percussion (aka pitched, keyboard, melodic, or mallet percussion) refers to a group of instruments arranged similarly to a piano which are struck with mallets. Familiar members of this group include the xylophone, marimba, vibraphone, and glockenspiel (aka bells). These are differentiated from one another by their construction materials and the range of pitches they can reach.
Irrespective of their size or materials though, there are several principles which are transferable across all tuned percussion. It’s these that I’ll be exploring today.
For clarity’s sake, throughout I’ll be referring to concert and ORFF tuned percussion, since these are the models with which school programs will be most familiar. Other variations include pit percussion for musicals (which may see xylophones sized down to maximize space) or marching instruments (which use a variation of the glockenspiel called a lyre).
Key Components
Broadly speaking, all tuned percussion instruments are composed of the same three building blocks: the bars, the resonators, and the frame.
The bars make the sound, vibrating with an audible pitch when struck by a mallet. The length and width of the bars impact what pitch is produced. If the bar is long and thin, its pitch will be lower. If the bar is short and thick, its pitch will be higher. This is what gives tuned percussion their characteristic tapered shape; the bars gradually reducing in size as you move up the range.
On concert instruments the bars are strung together with a tension cord which is pulled taught at the bass end by tension springs. The cord then rests on the frame, suspended on posts so the bars can vibrate freely.
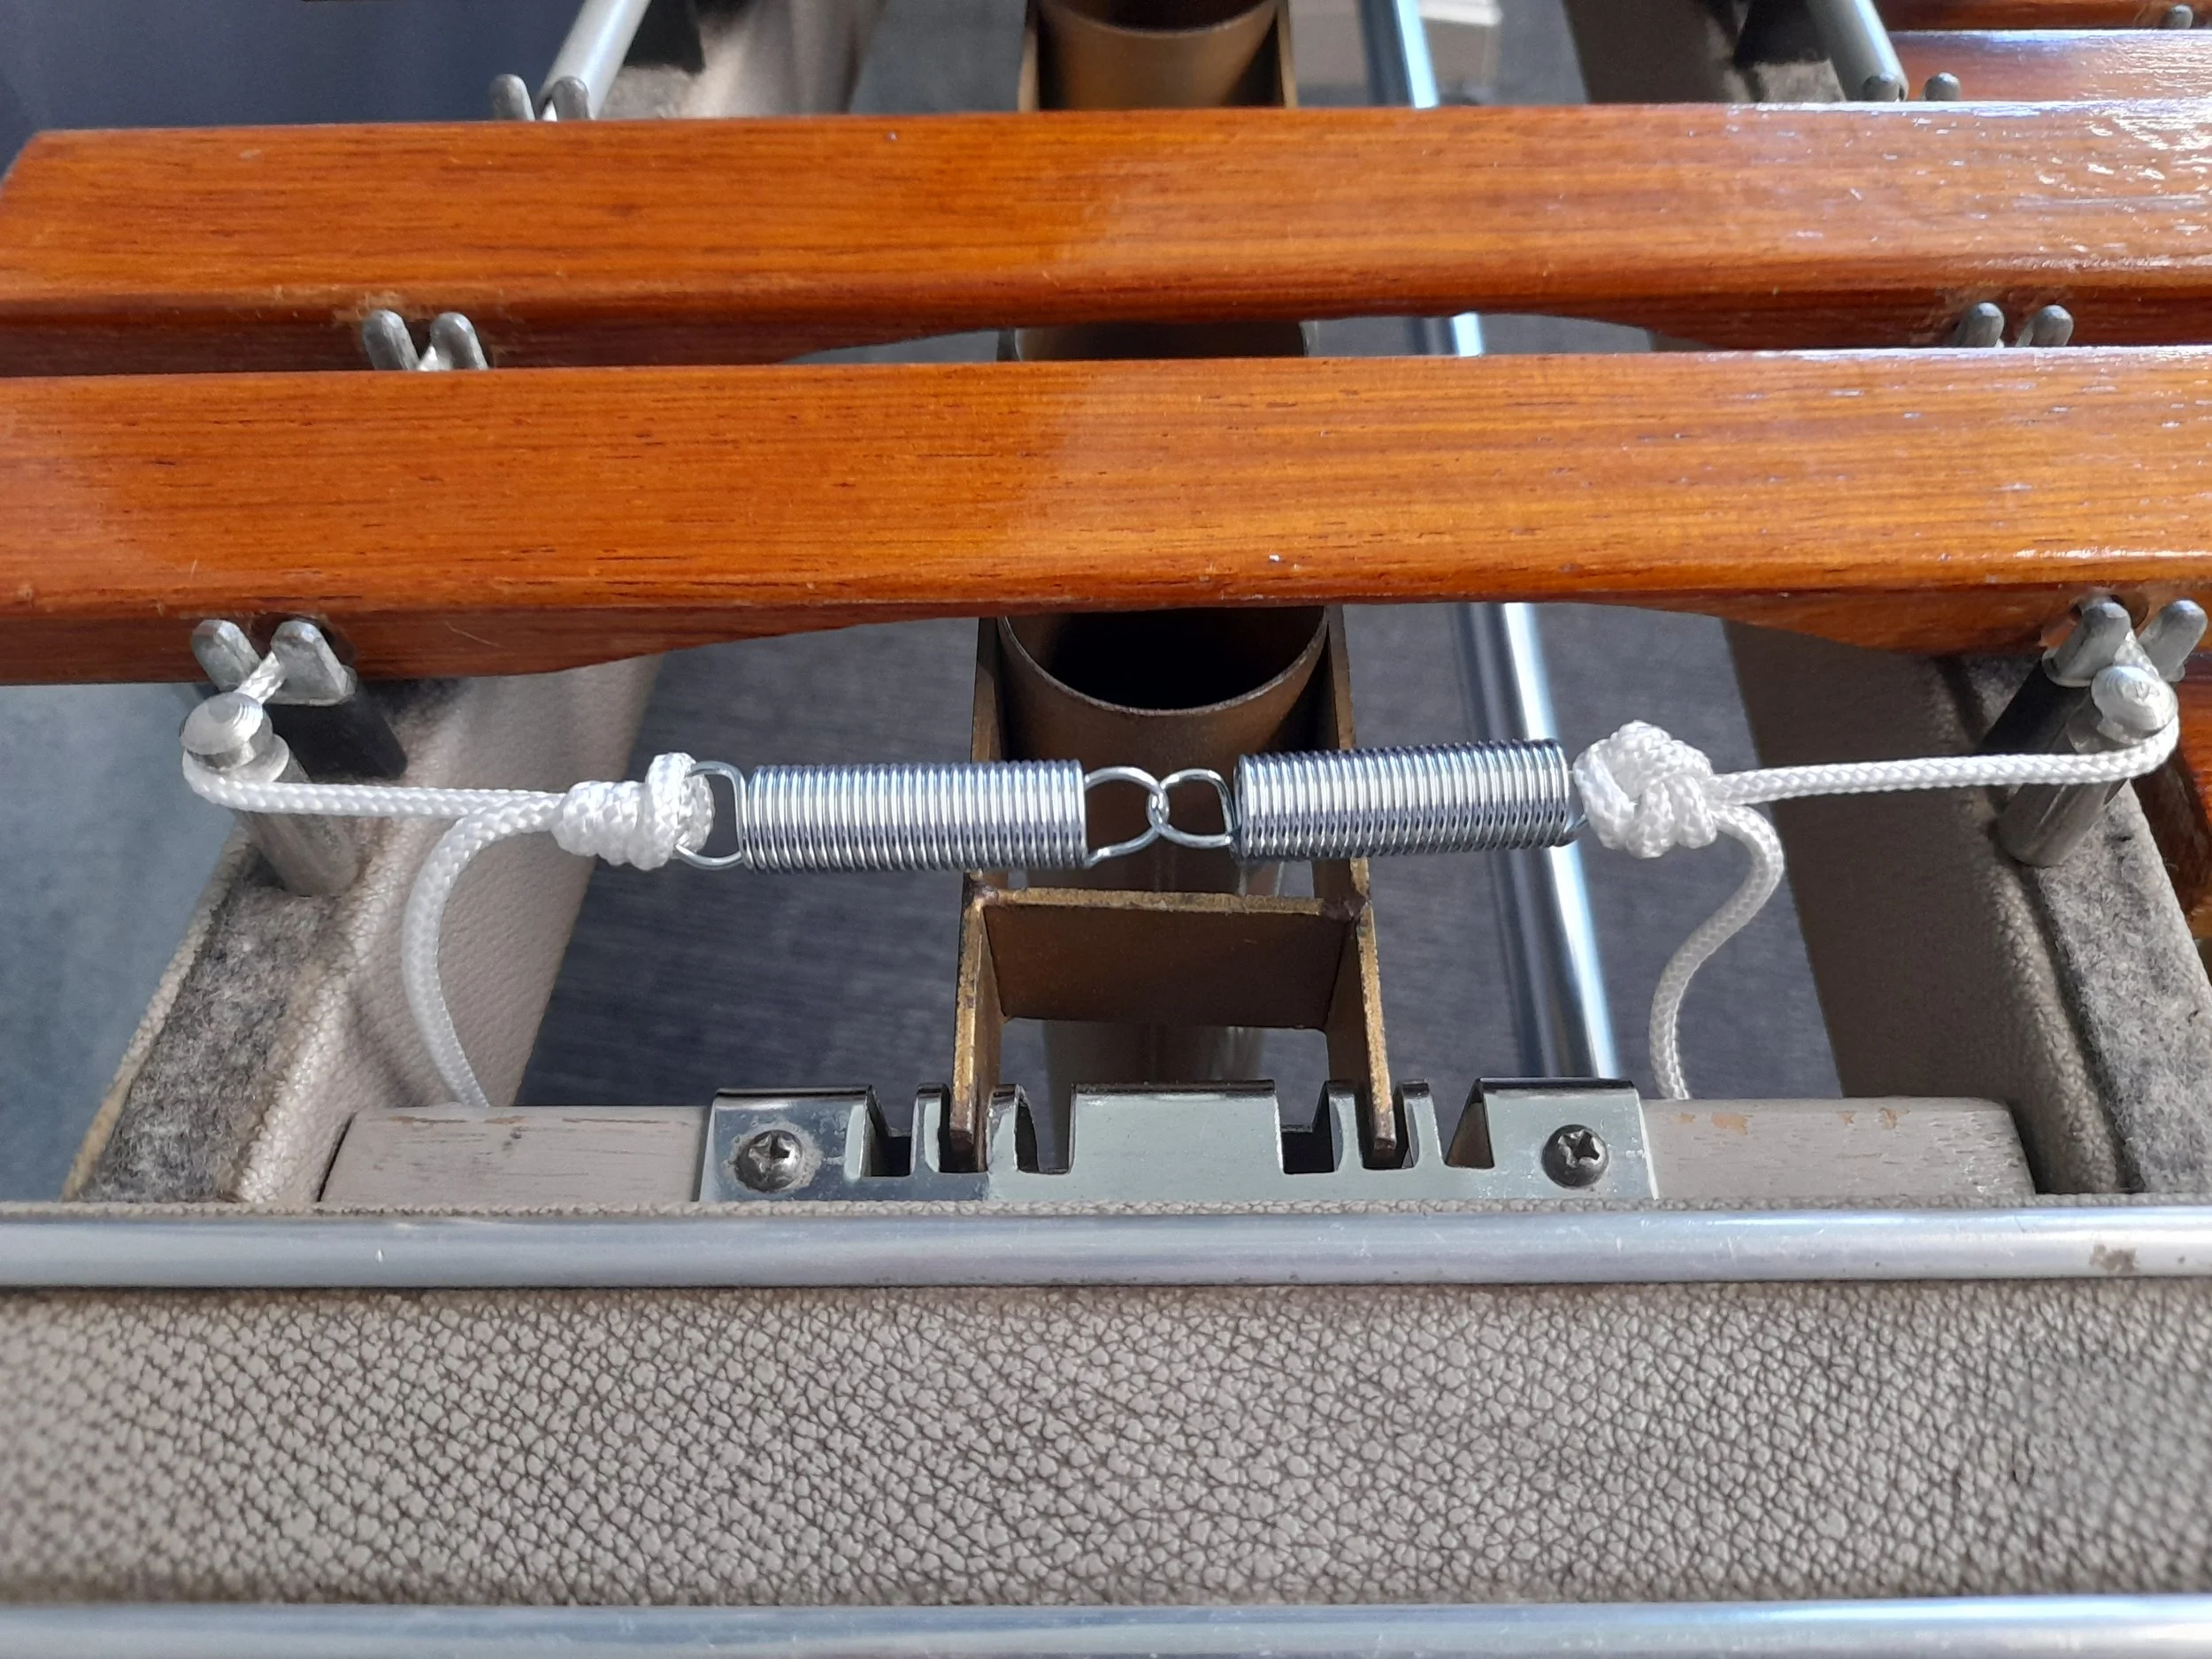
Close-up of tension springs and cord.
The resonators make the sound louder by capturing and funneling the bar’s vibrations. On xylophones, marimbas, and vibraphones the resonators are large pipes suspended under the bars. Inside each pipe is a cap which stops the sound from escaping and matches the resonance of the pipe to the bar’s pitch. The larger the diameter of the pipe and depth of the cap, the deeper the pitch.
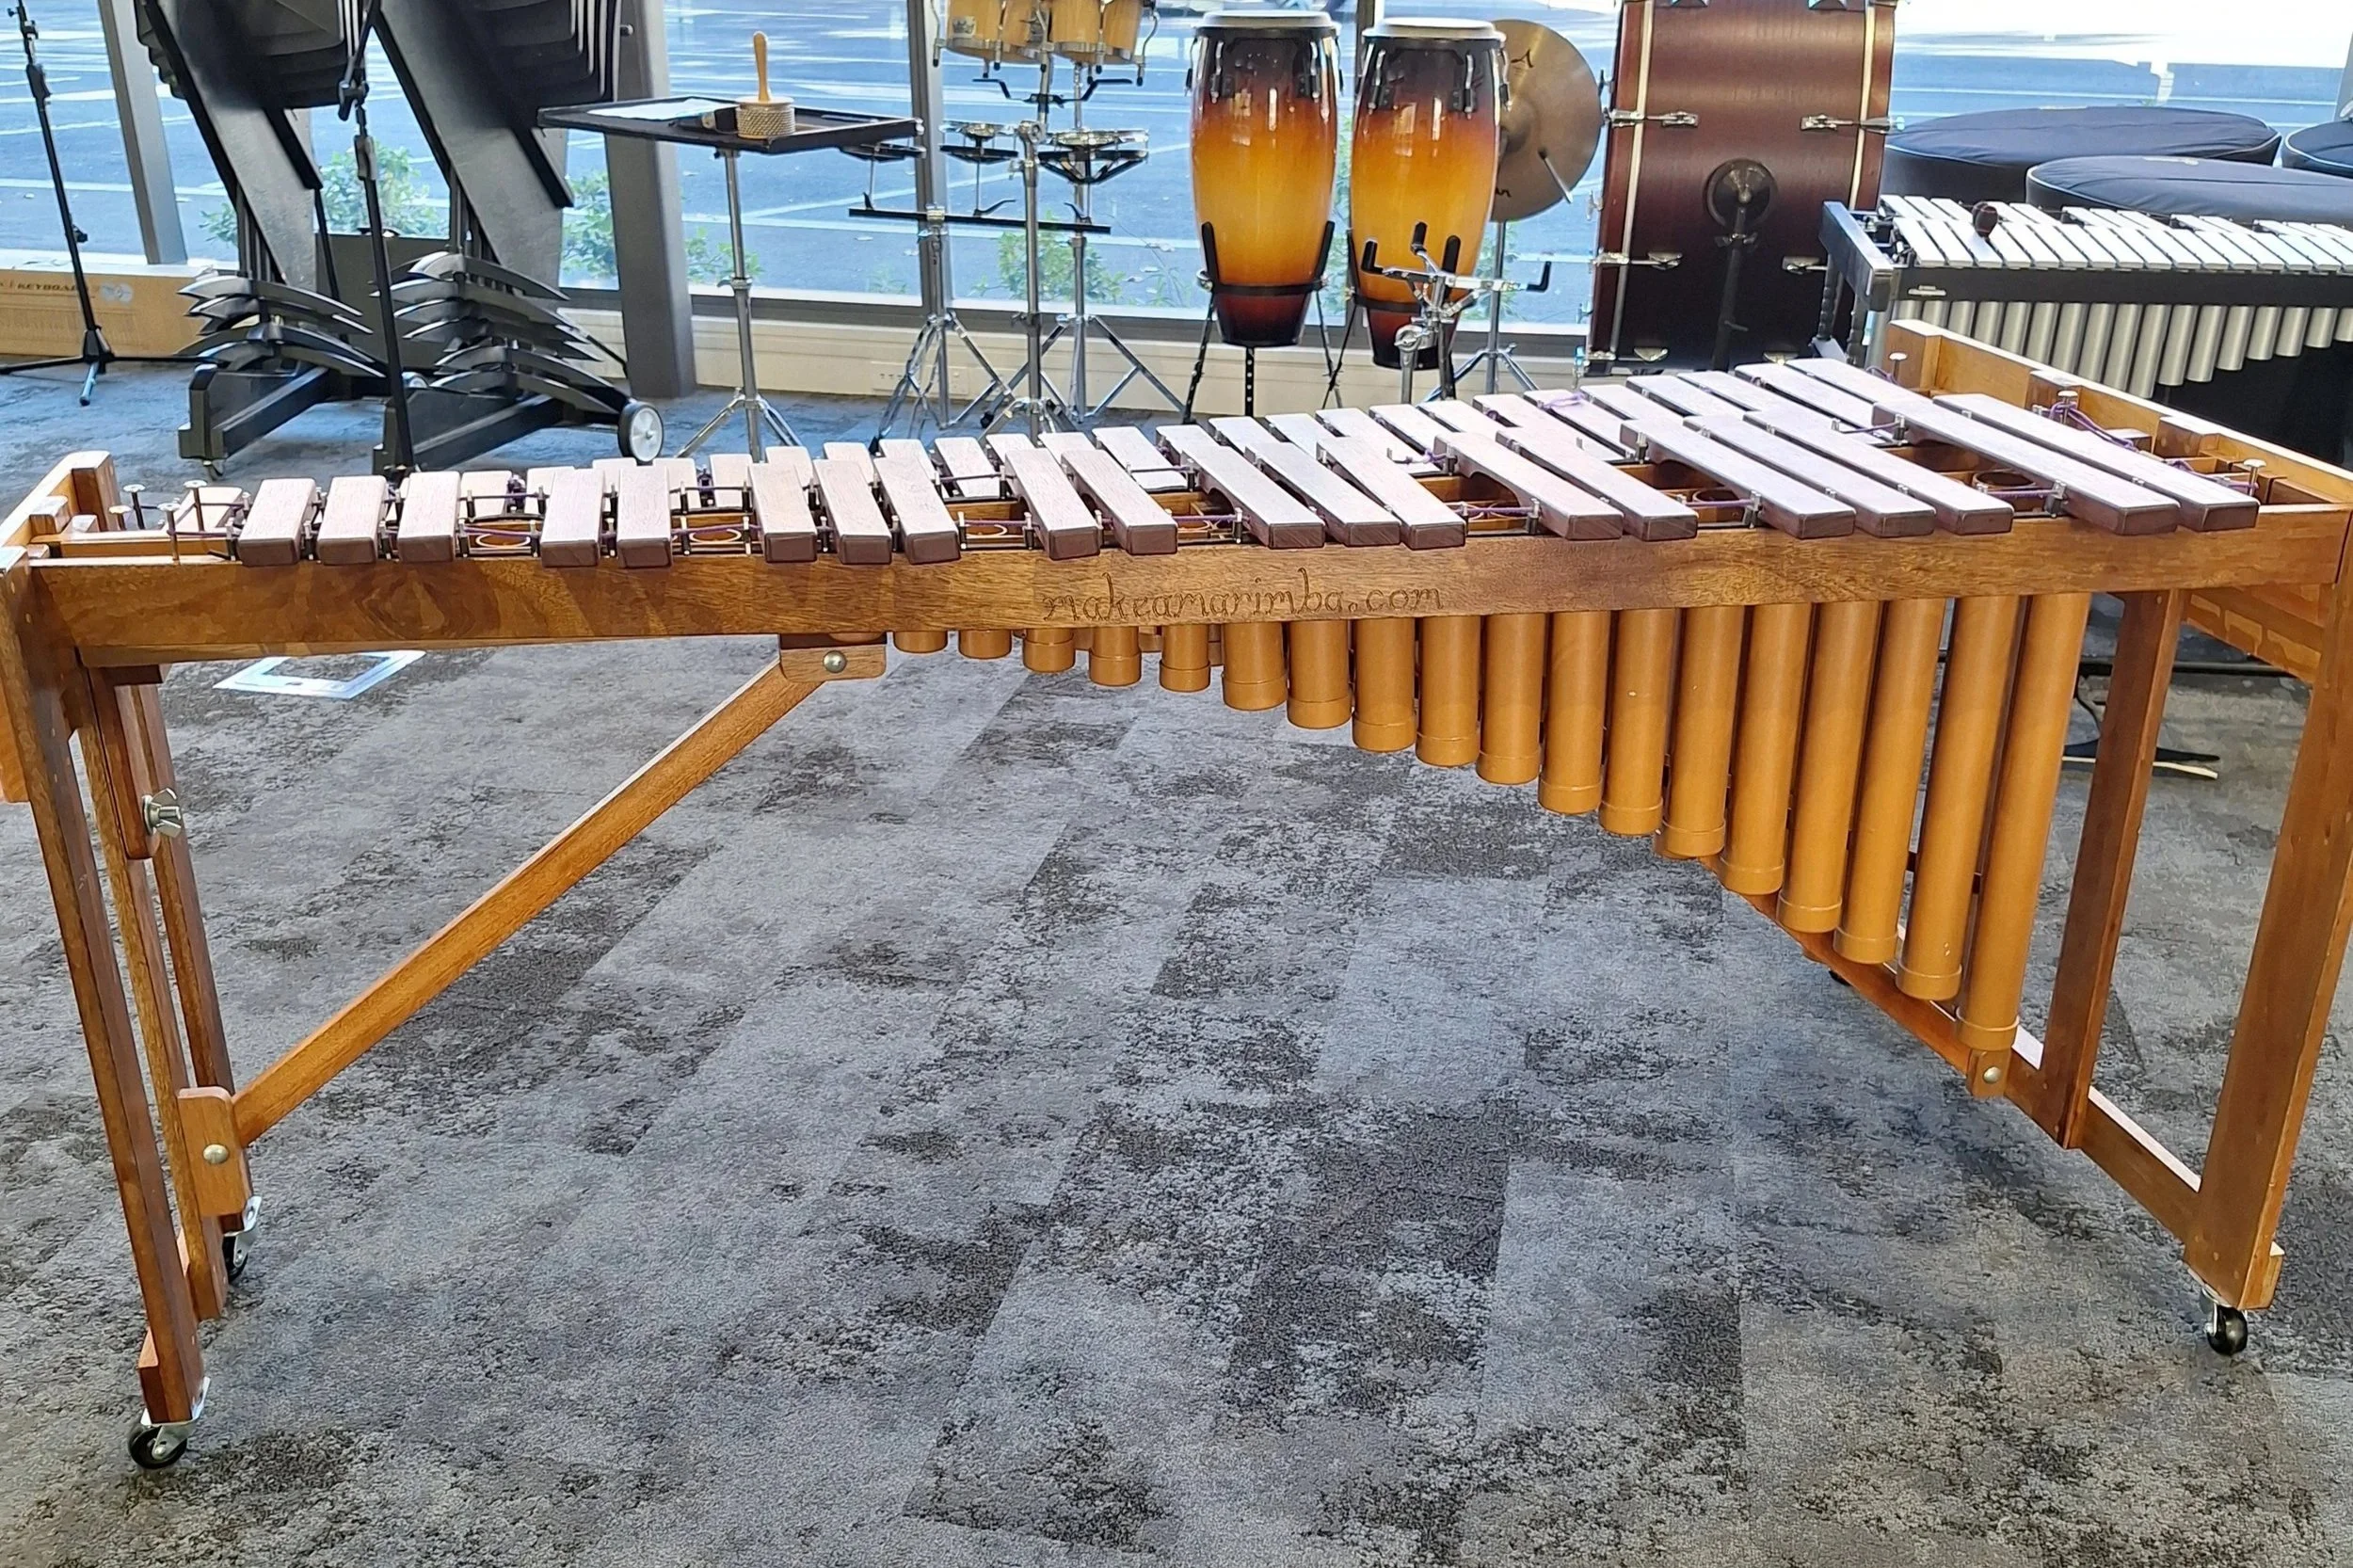
Image of marimba resonators. Notice that the lower notes have larger pipes.
Glockenspiels and ORFF instruments typically won’t have pipes. However, the box frame operates as a resonating chamber. The bass of the frame will be slanted or tiered so the space underneath the bars gets shallower as the pitch rises.
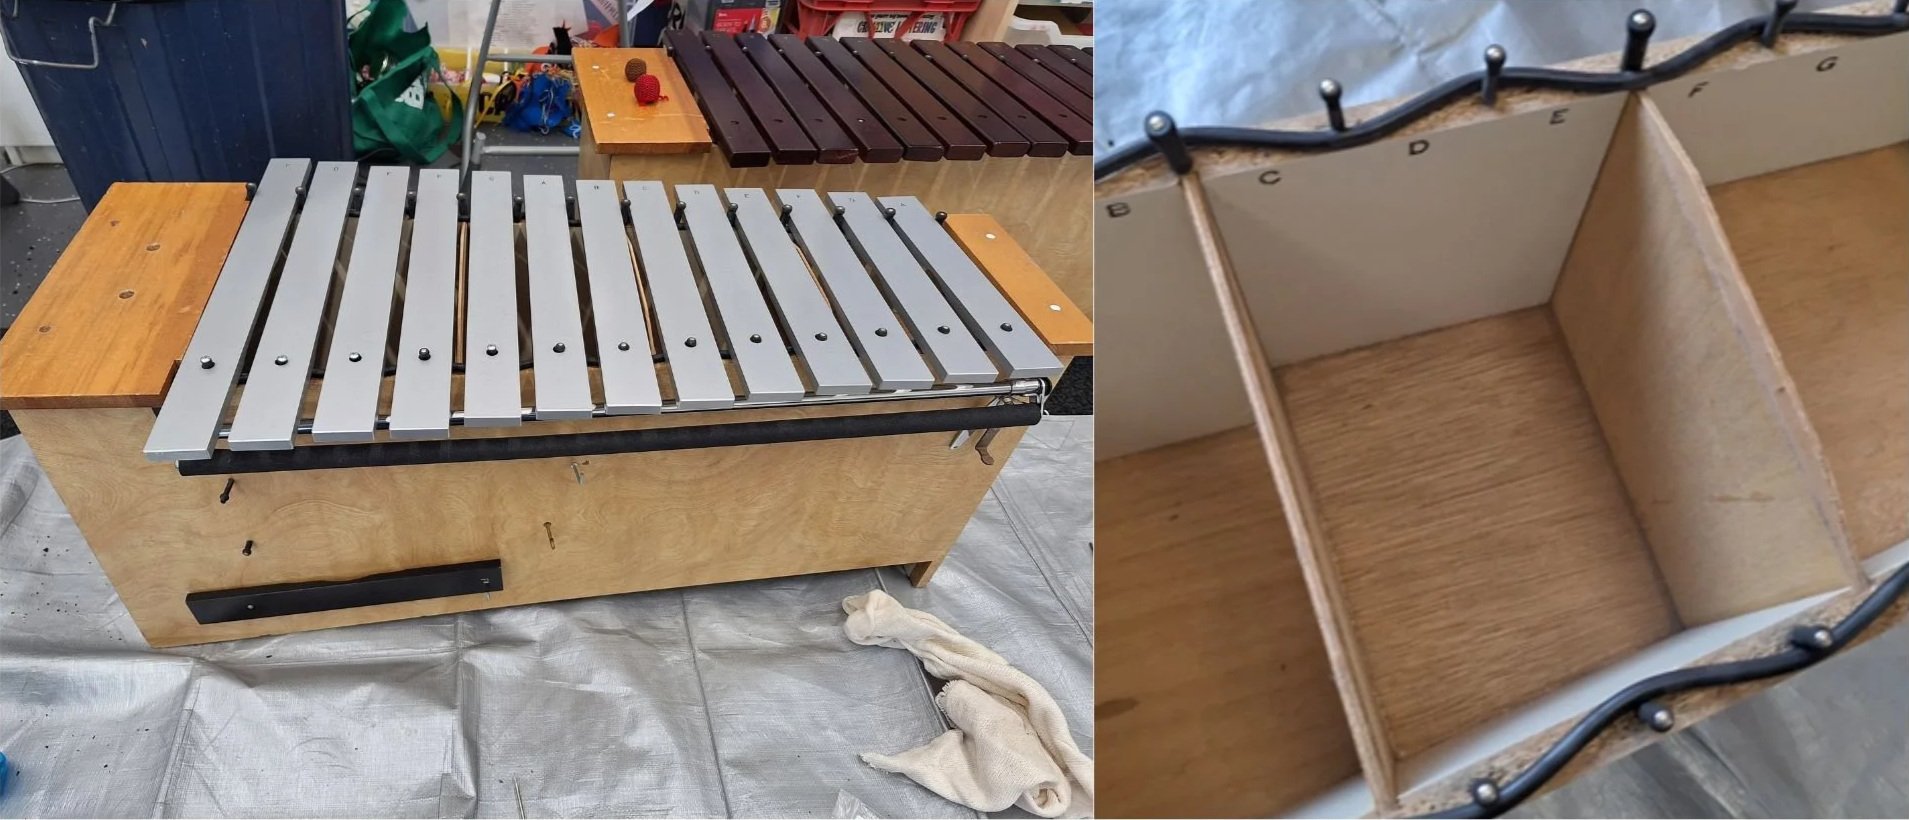
ORFF box frame with tiered base.
The frame keeps everything in place and aligned. Designs may differ between brands or models, but there are some common components.
Crossbeams/rails = the long supports running underneath the bars from one end to the other (two under the naturals and two under the accidentals). They hold the ends together and lend the resonators stability. Don’t push on these when moving the instrument! Use the frame ends instead.
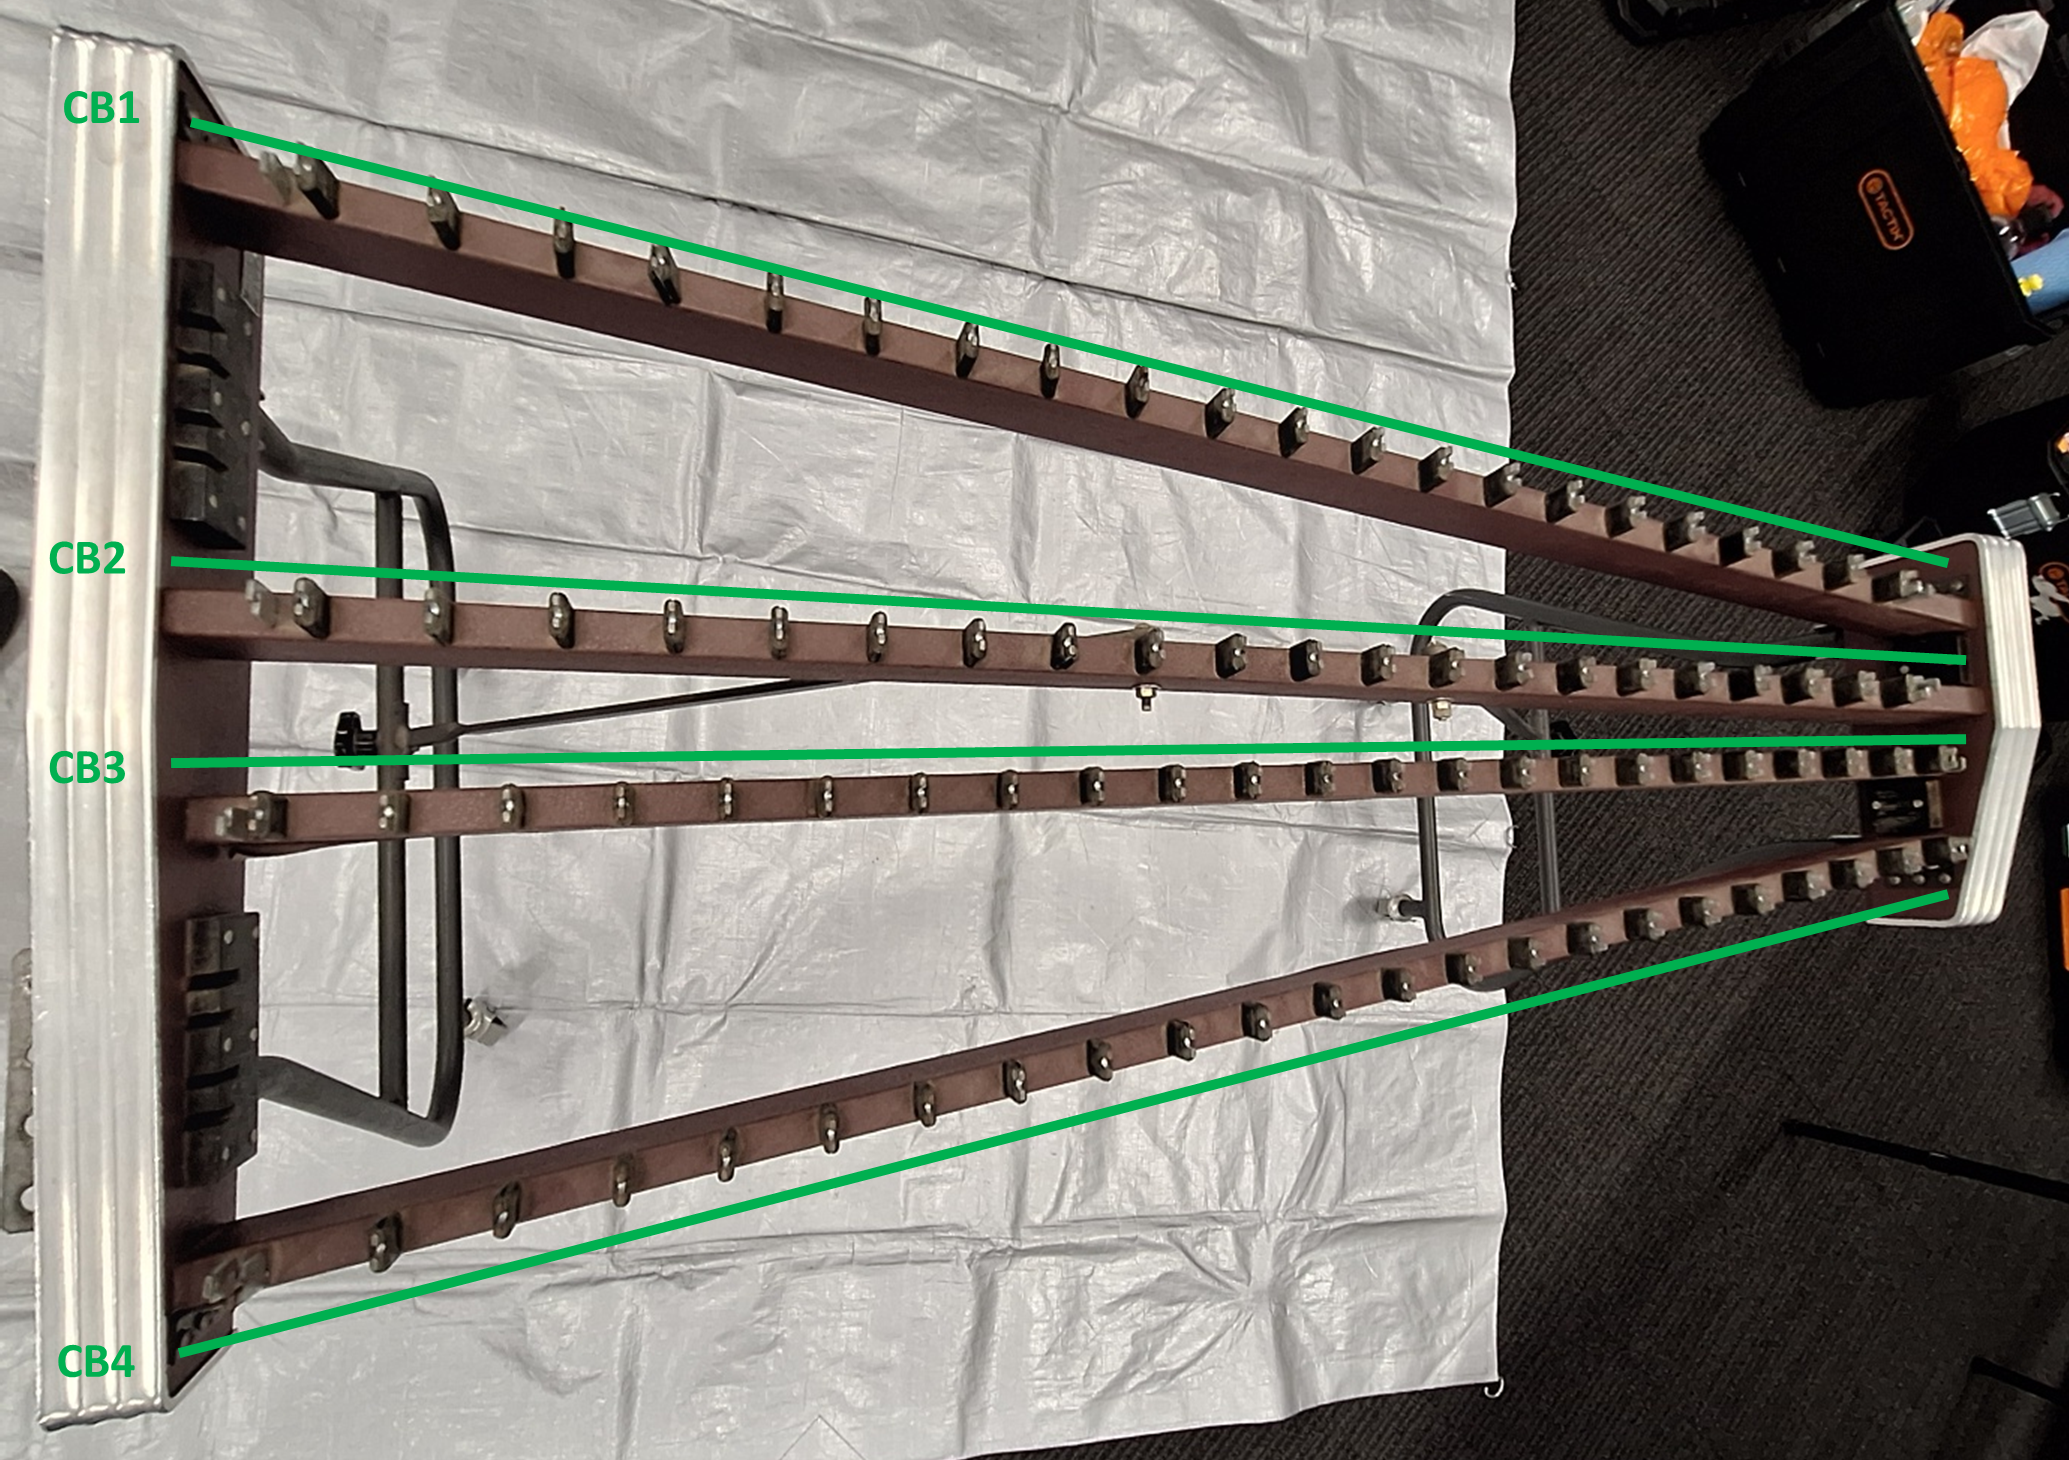
Diagram highlighting the four crossbeams of a xylophone.
Posts/pegs= numerous metal support pins on the crossbeams which help space out the bars and allow them to vibrate cleanly. Concert xylophones, marimbas, and vibraphones will have two posts on either side of each bar where the tension cord runs through (left). Glockenspiels and ORFF percussion will utilize a combination of 2-3 posts running parallel to or through the bars depending on the brand (right).
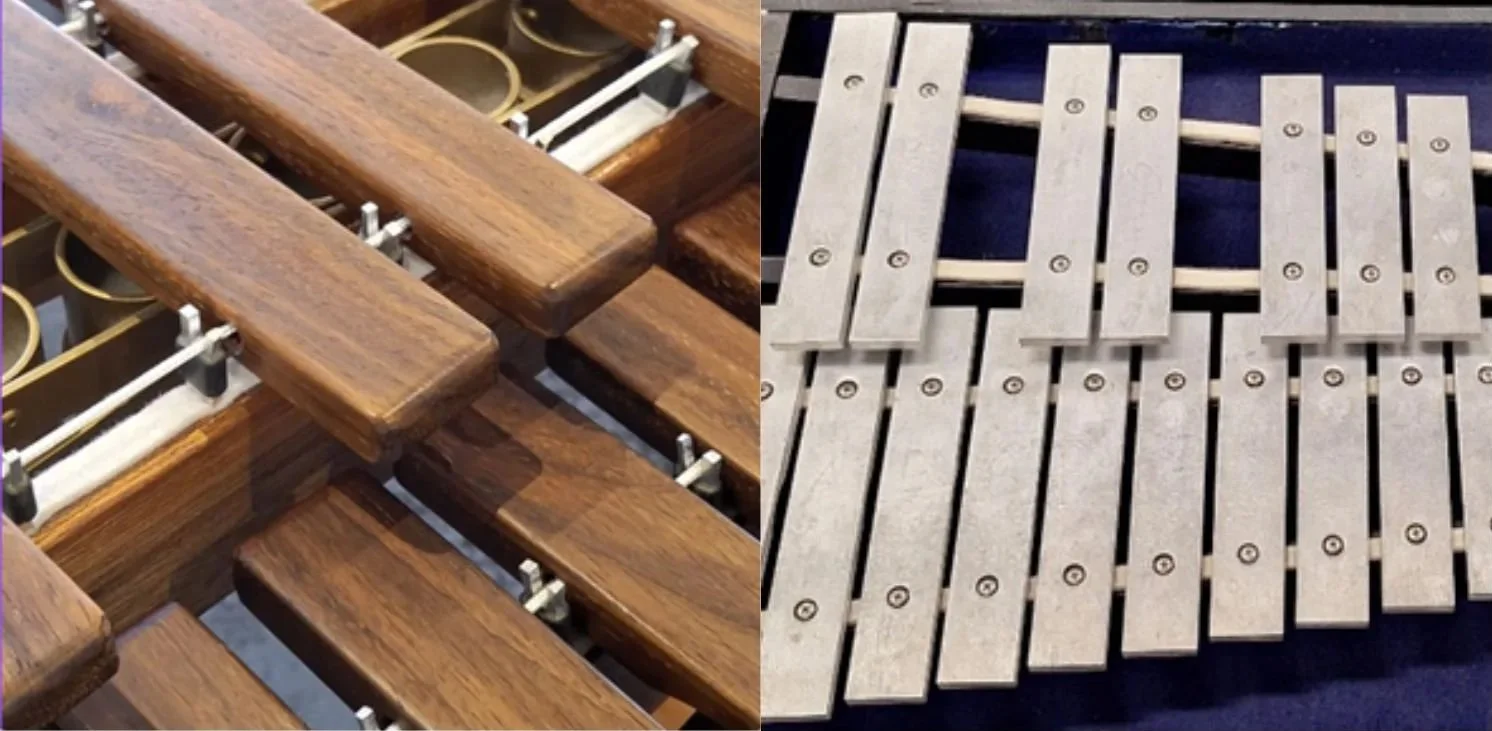
Close-up of marimba posts (left). Close-up of glockenspiel posts (right).
Post dampeners = rubber sleeves which limit the amount of contact sound between the bars and posts when notes are played. Easiest component to lose or break.
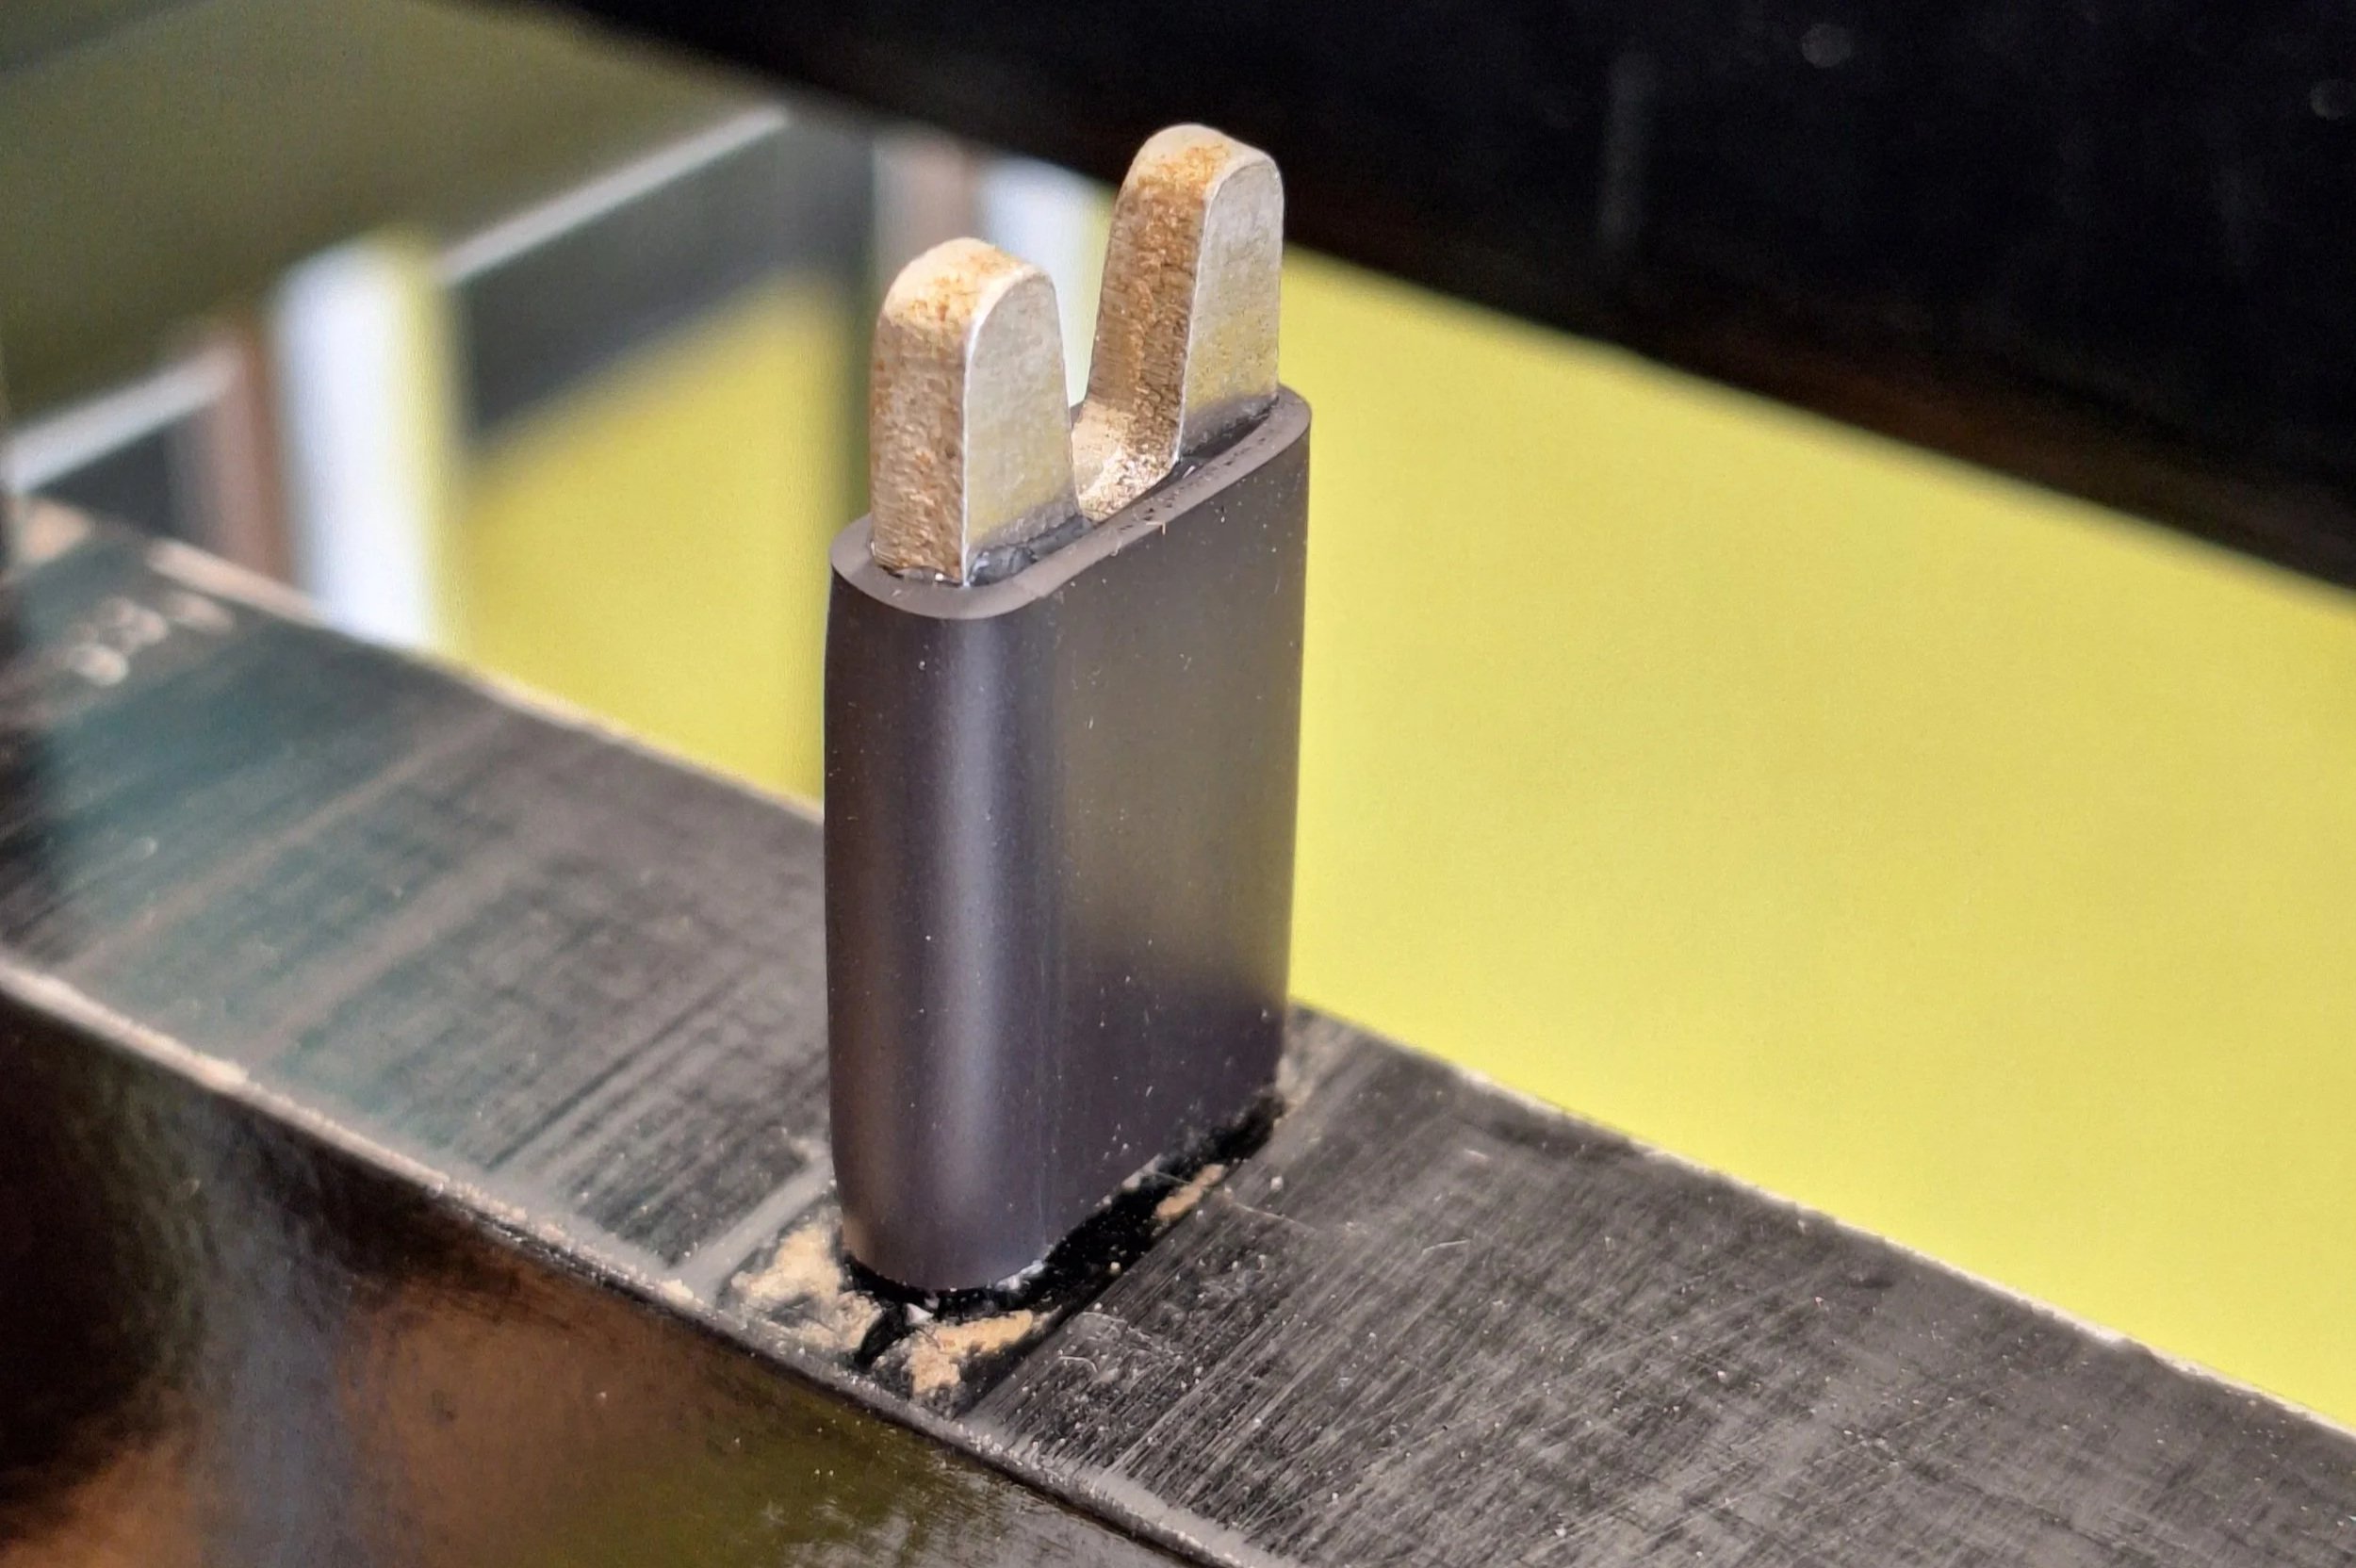
Close-up of rubber post-dampener.
Height adjusters = does what it says on the tin. Your instrument may or may not have this depending on its brand and age. Note that if you are adjusting the height of a vibraphone MAKE SURE YOU UNDO THE PEDAL ROD FIRST! If you don’t, this rod will bend under the weight!
The Playing Zone
The best playing zone on most tuned percussion is in the middle of the bars directly over the resonators. This will produce the fullest sound. When rolling or playing repeated phrases on the same bar, arrange the mallets so they are both playing slightly off-centre so their sound activates the resonator equally.
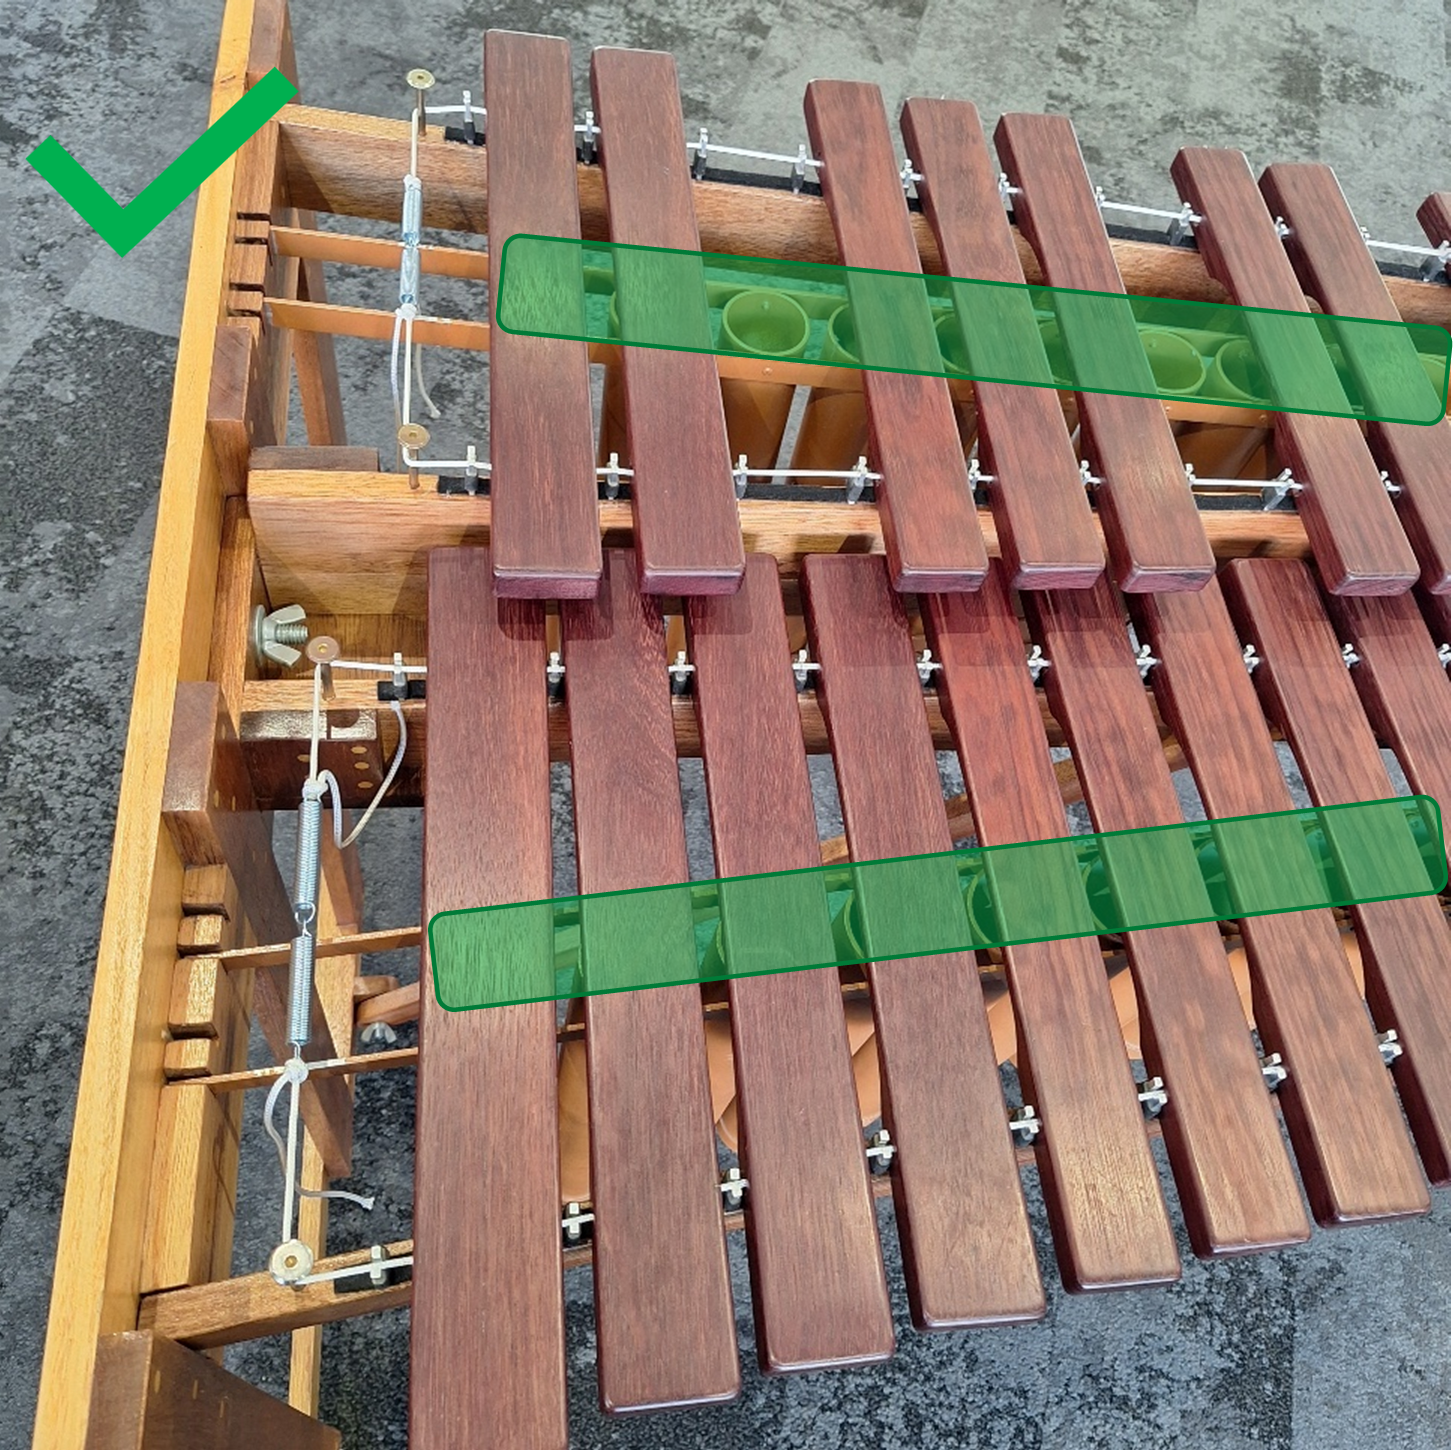
Image of marimba bars, green highlight to show best playing zone.
The area you want to avoid is where the bars connect to or rest against the frame. On concert instruments, the dead zone is where the cord runs horizontally through the bars. On glockenspiels or ORFF instruments, the dead zone is where the posts drill vertically through the bars.
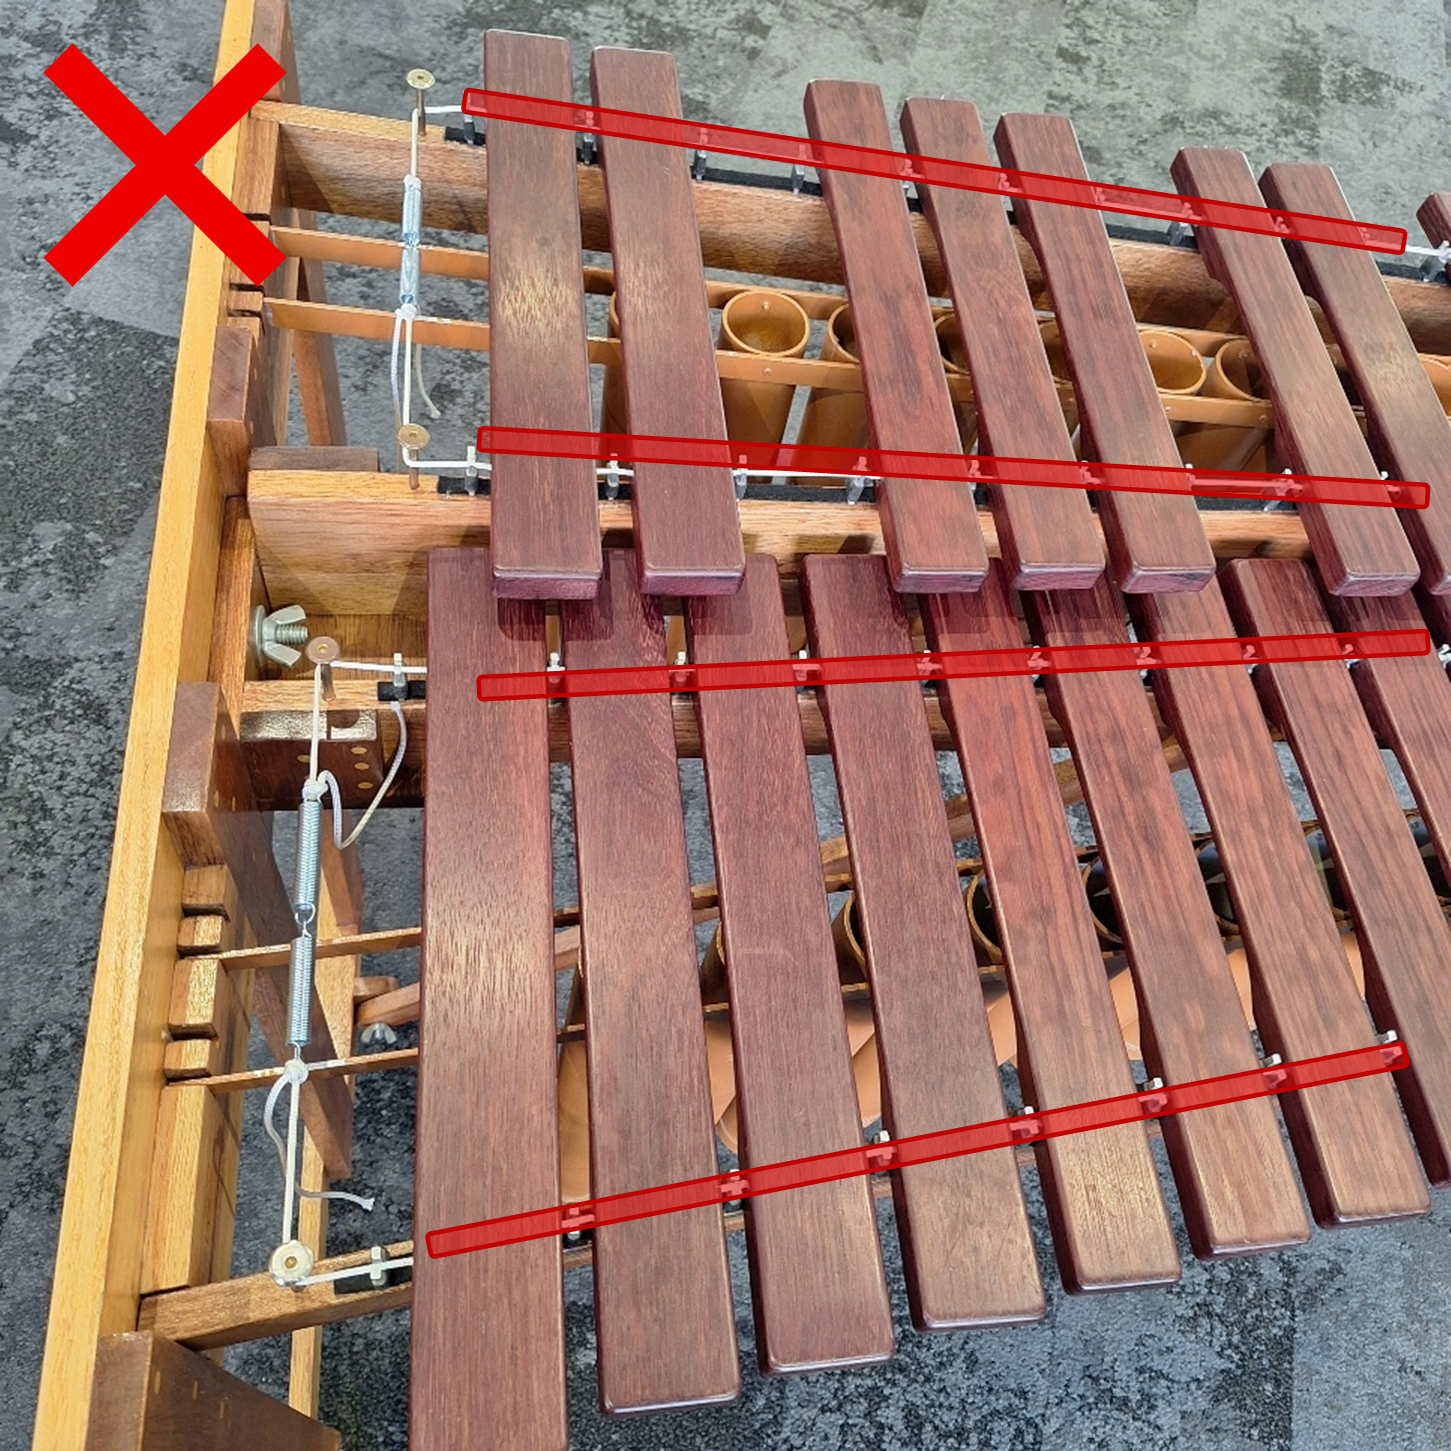
Image of marimba bars, red highlight to show worst playing zone.
The second-best playing zone is on the ends of the bars. This is often used when playing fast changes between accidental and natural notes, where you don’t have time to reliably strike the centre.
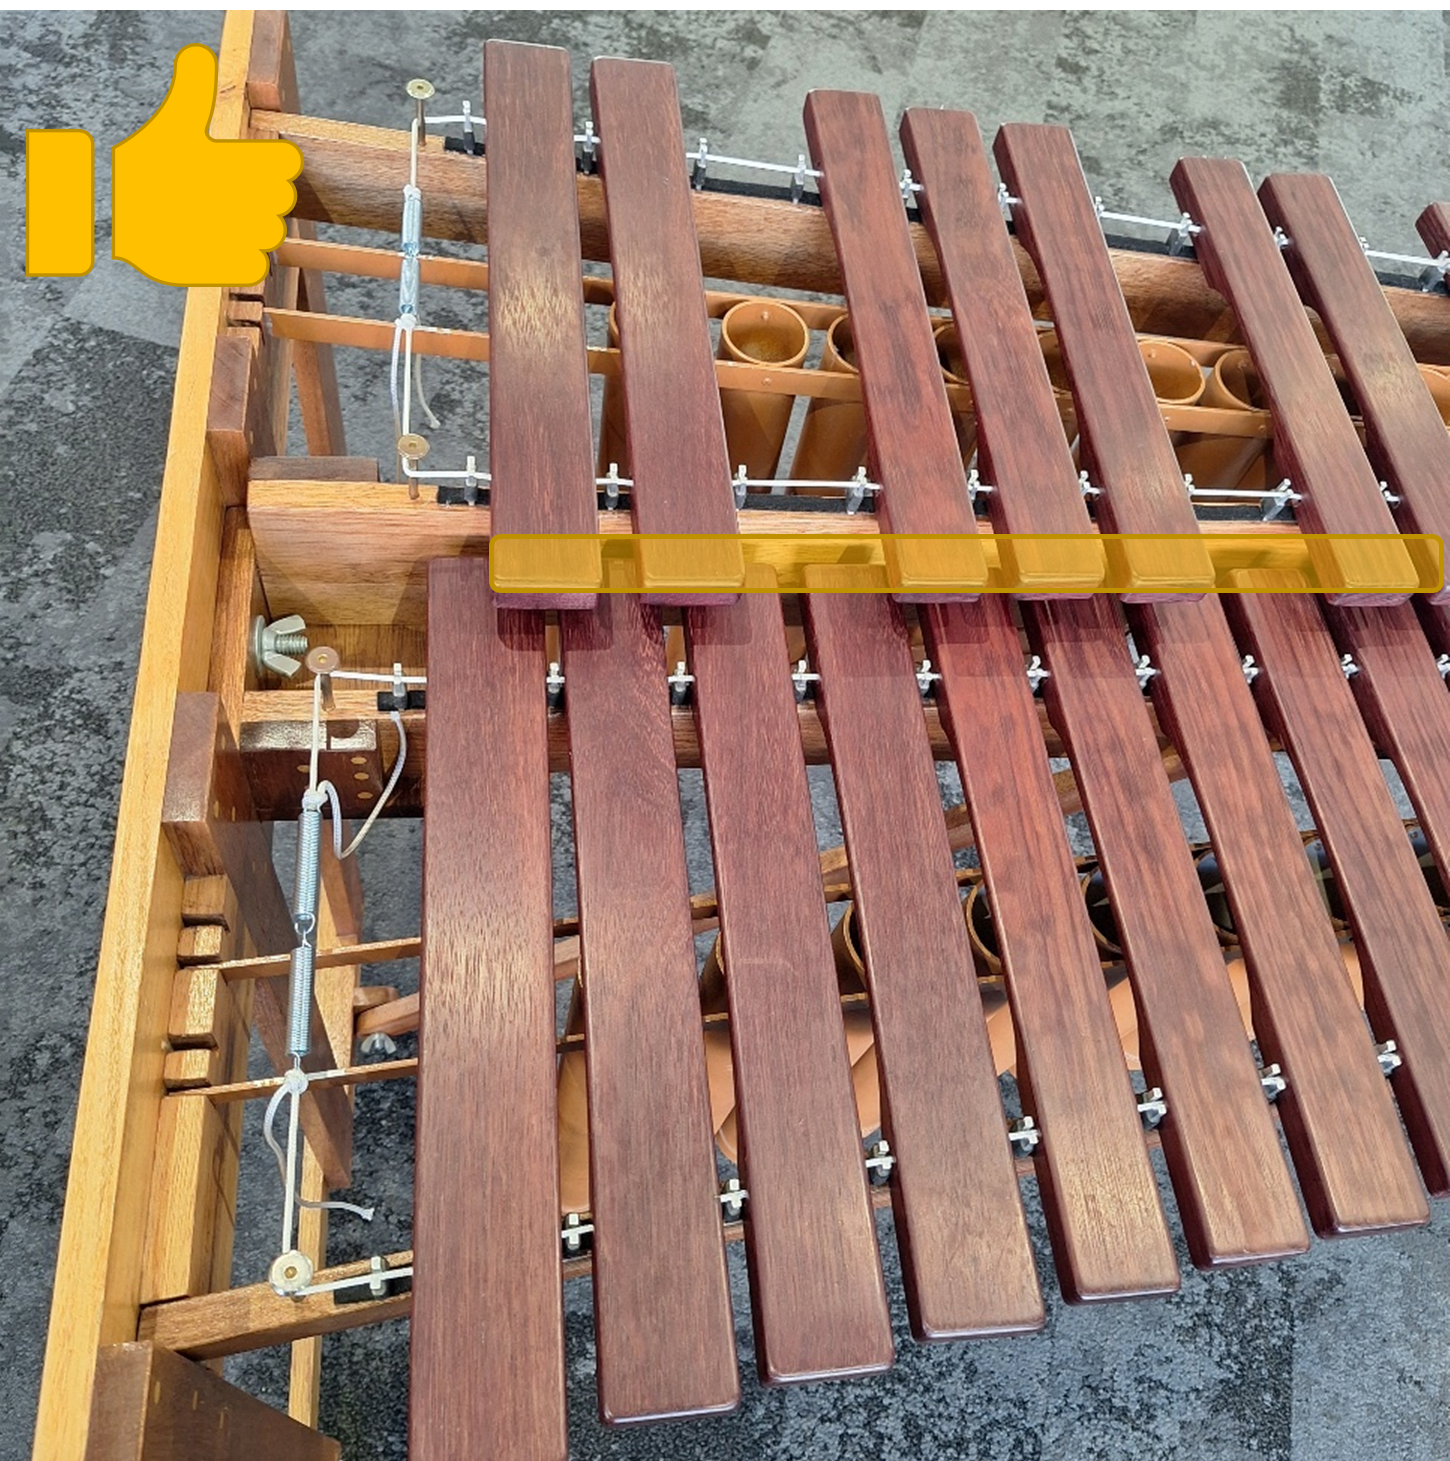
Image of marimba bars, yellow highlight to show second best playing zone.
A Note on Tubular Bells
A member of the tuned percussion family which you may be less familiar with are tubular bells (aka chimes), which comprise numerous tubes hung vertically in a frame. The playing zone for chimes are the caps at the top of the tubes. In this way chimes effectively combine the purpose of the bars and resonators: striking zone and amplifier. Similar to a vibraphone, a full set of tubular bells will have a pedal which can be used to dampen or extend the length of notes when played.
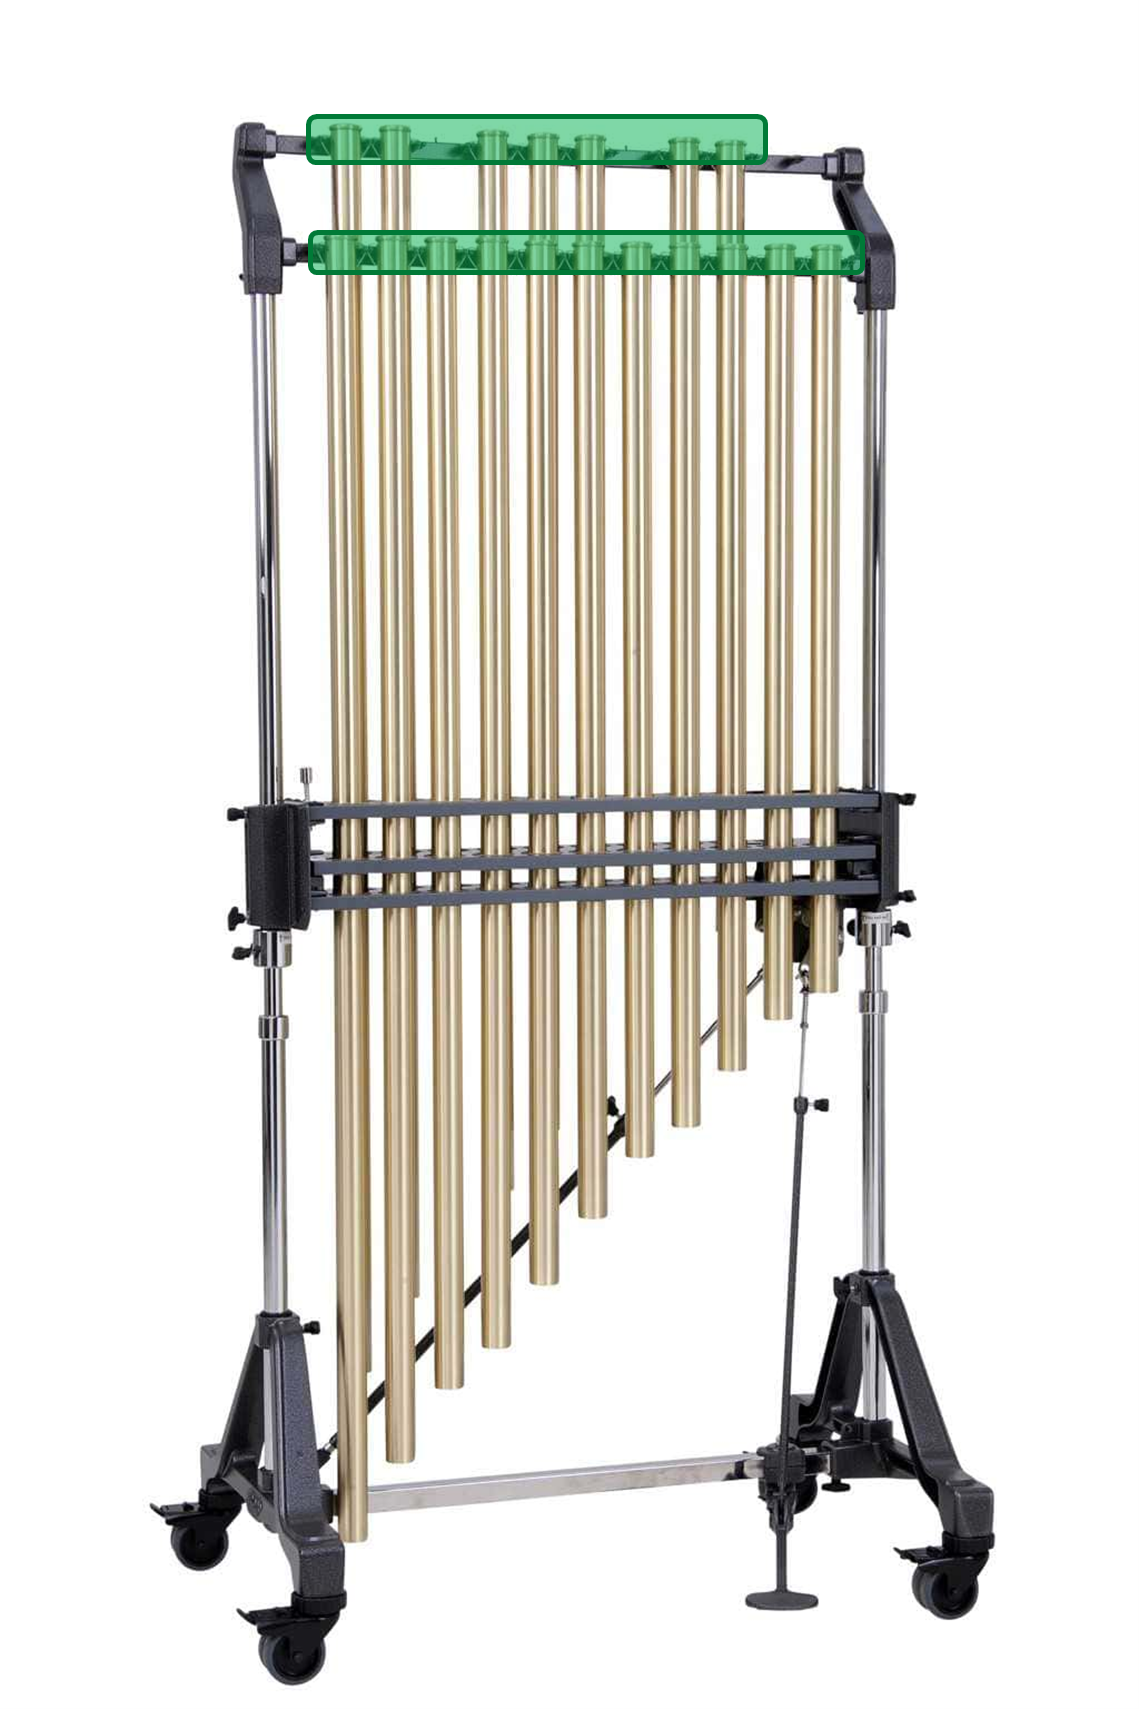
Image of tubular bells, green highlight to show correct playing zone.
How to Hold Mallets
My first piece of advice for holding mallets is to think of them as an extension of your arm.
To find the best mallet grip, follow these steps:
Place the mallet on a flat surface
Slide your fingers under the mallet (about a third up from the end) so that the shaft rests against the first knuckle of your pointer finger.
Place your thumb on the other side of the shaft and apply gentle pressure.
While still applying gentle pressure to the mallet, turn your wrist over
Drop your arm by your side in its natural hanging position.
Congrats, you’ve learnt how to hold a mallet!
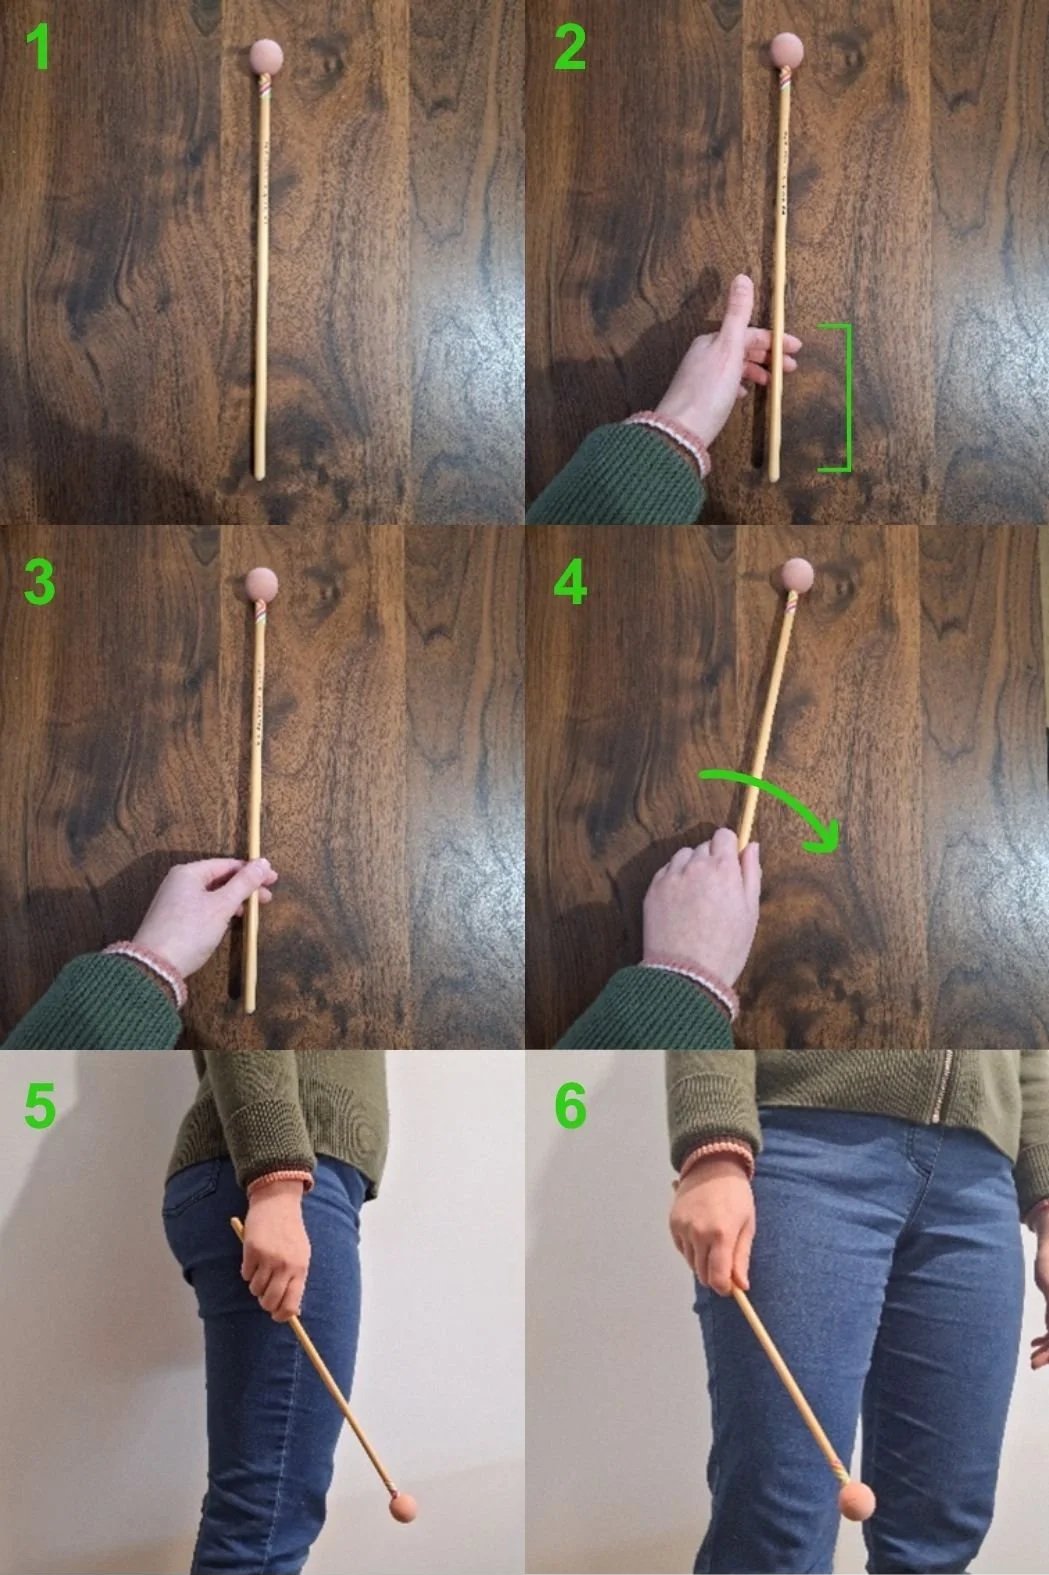
A series of six images showing how to hold a mallet.
The pressure exerted by your pointer finger and thumb on either side of the mallet in Steps 1-3 creates a pivot point called the fulcrum. The fulcrum helps the mallet swing back and forth smoothly using the weight of the mallet head and your hand as counterbalances (like a seesaw).
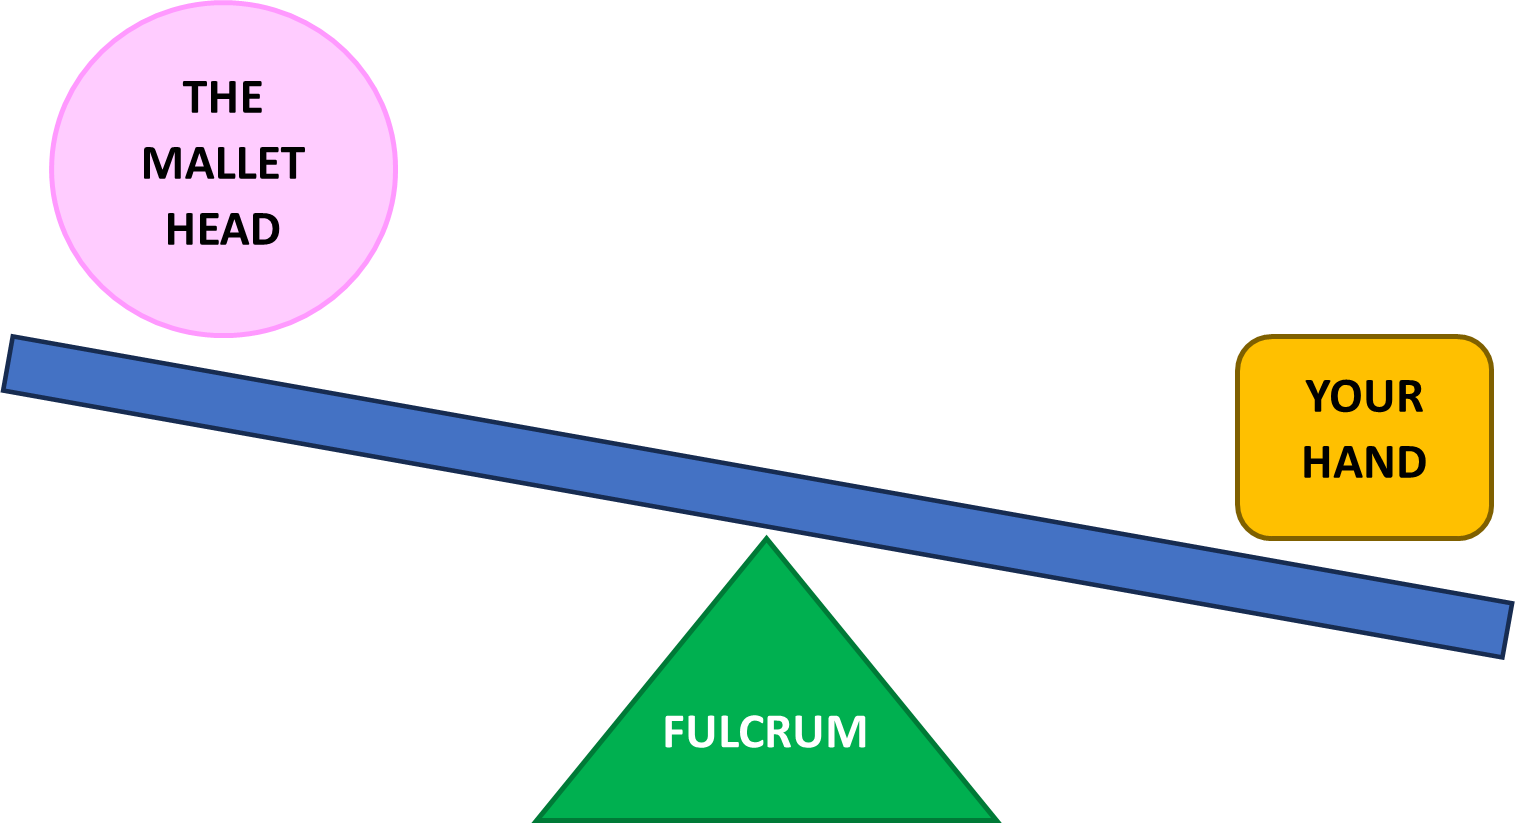
A diagram of the fulcrum, demonstrating how the mallet head and your hand act as counterbalances.
As for the other three fingers, I like to call these ‘The Support Crew’. Their main job is to stabilize the mallet and control stick height. As such, they should curl gently around the mallet but not apply pressure. The underside of your grip should look something like this.
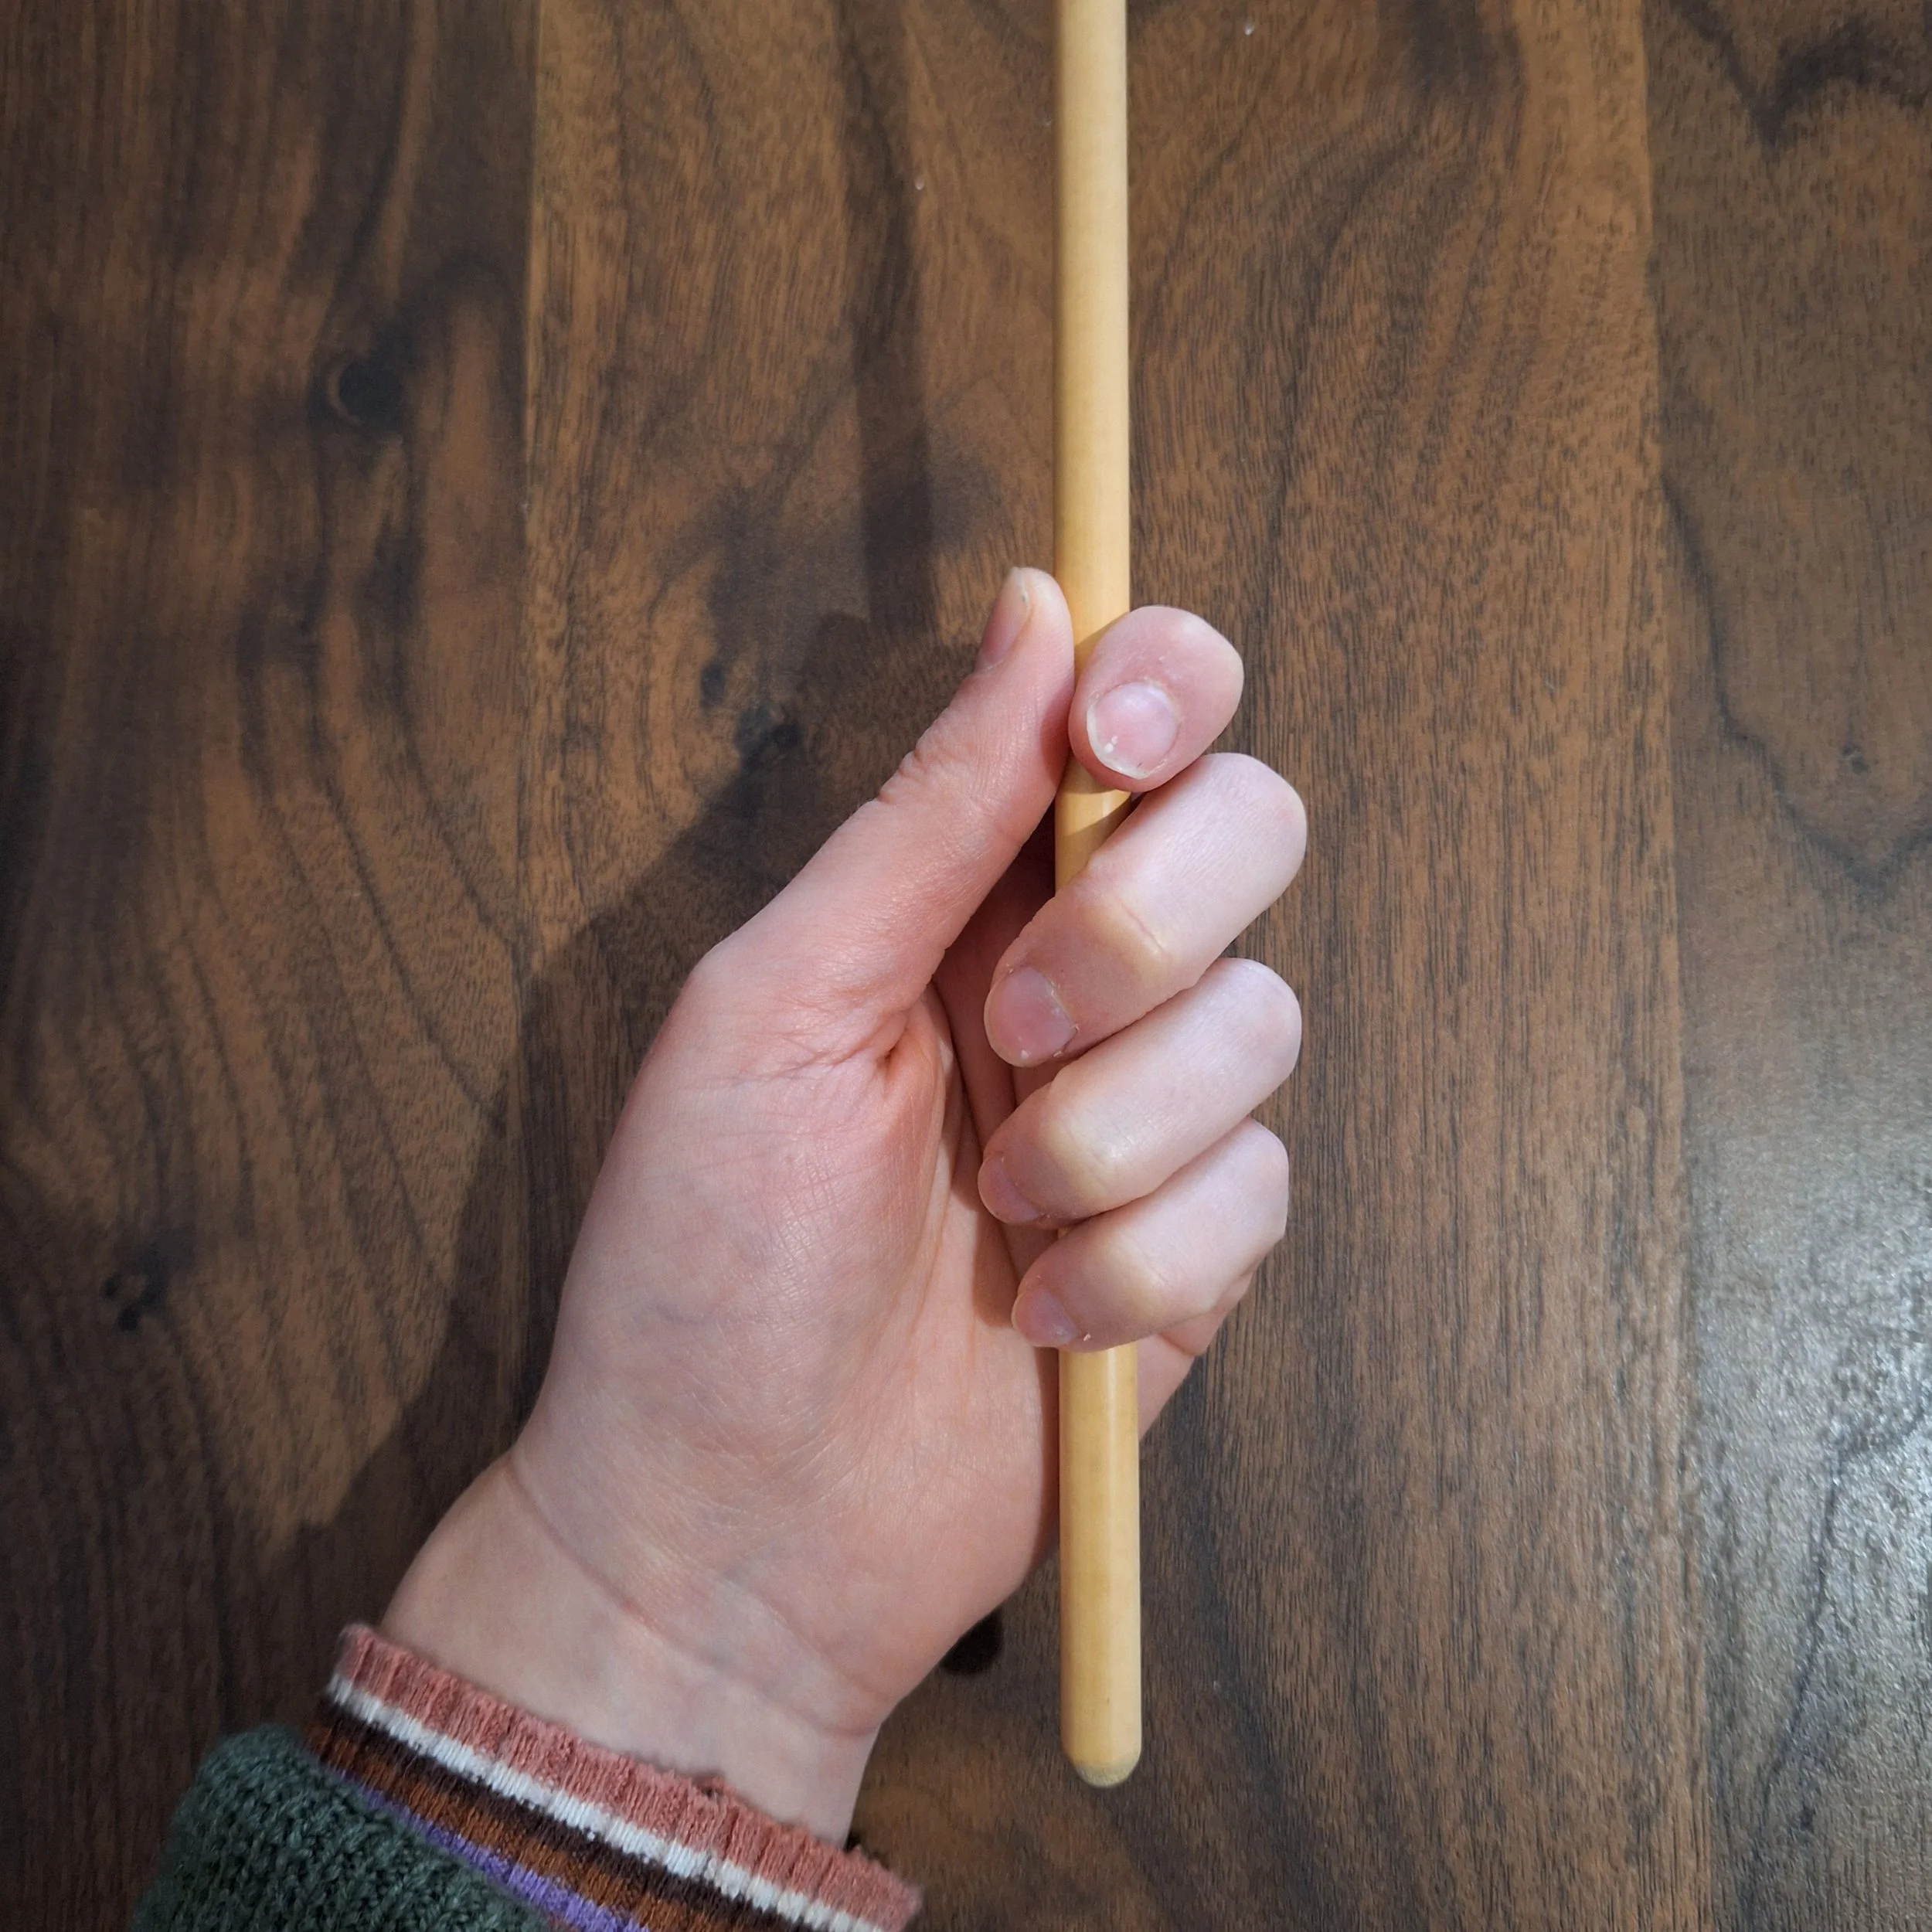
Close-up image of what the underside of your fulcrum should look like.
The aim of Step 5 is to ensure your mallet grip is relaxed. Since the mallet is an extension of your arm, it’s important to release any tension held in your joints (particularly the wrist, elbow, and shoulder). Letting your arms hang by your side allows gravity to help with this. There should also be a slight gap between your finger and thumb - if there isn’t, you’re probably gripping too tightly!
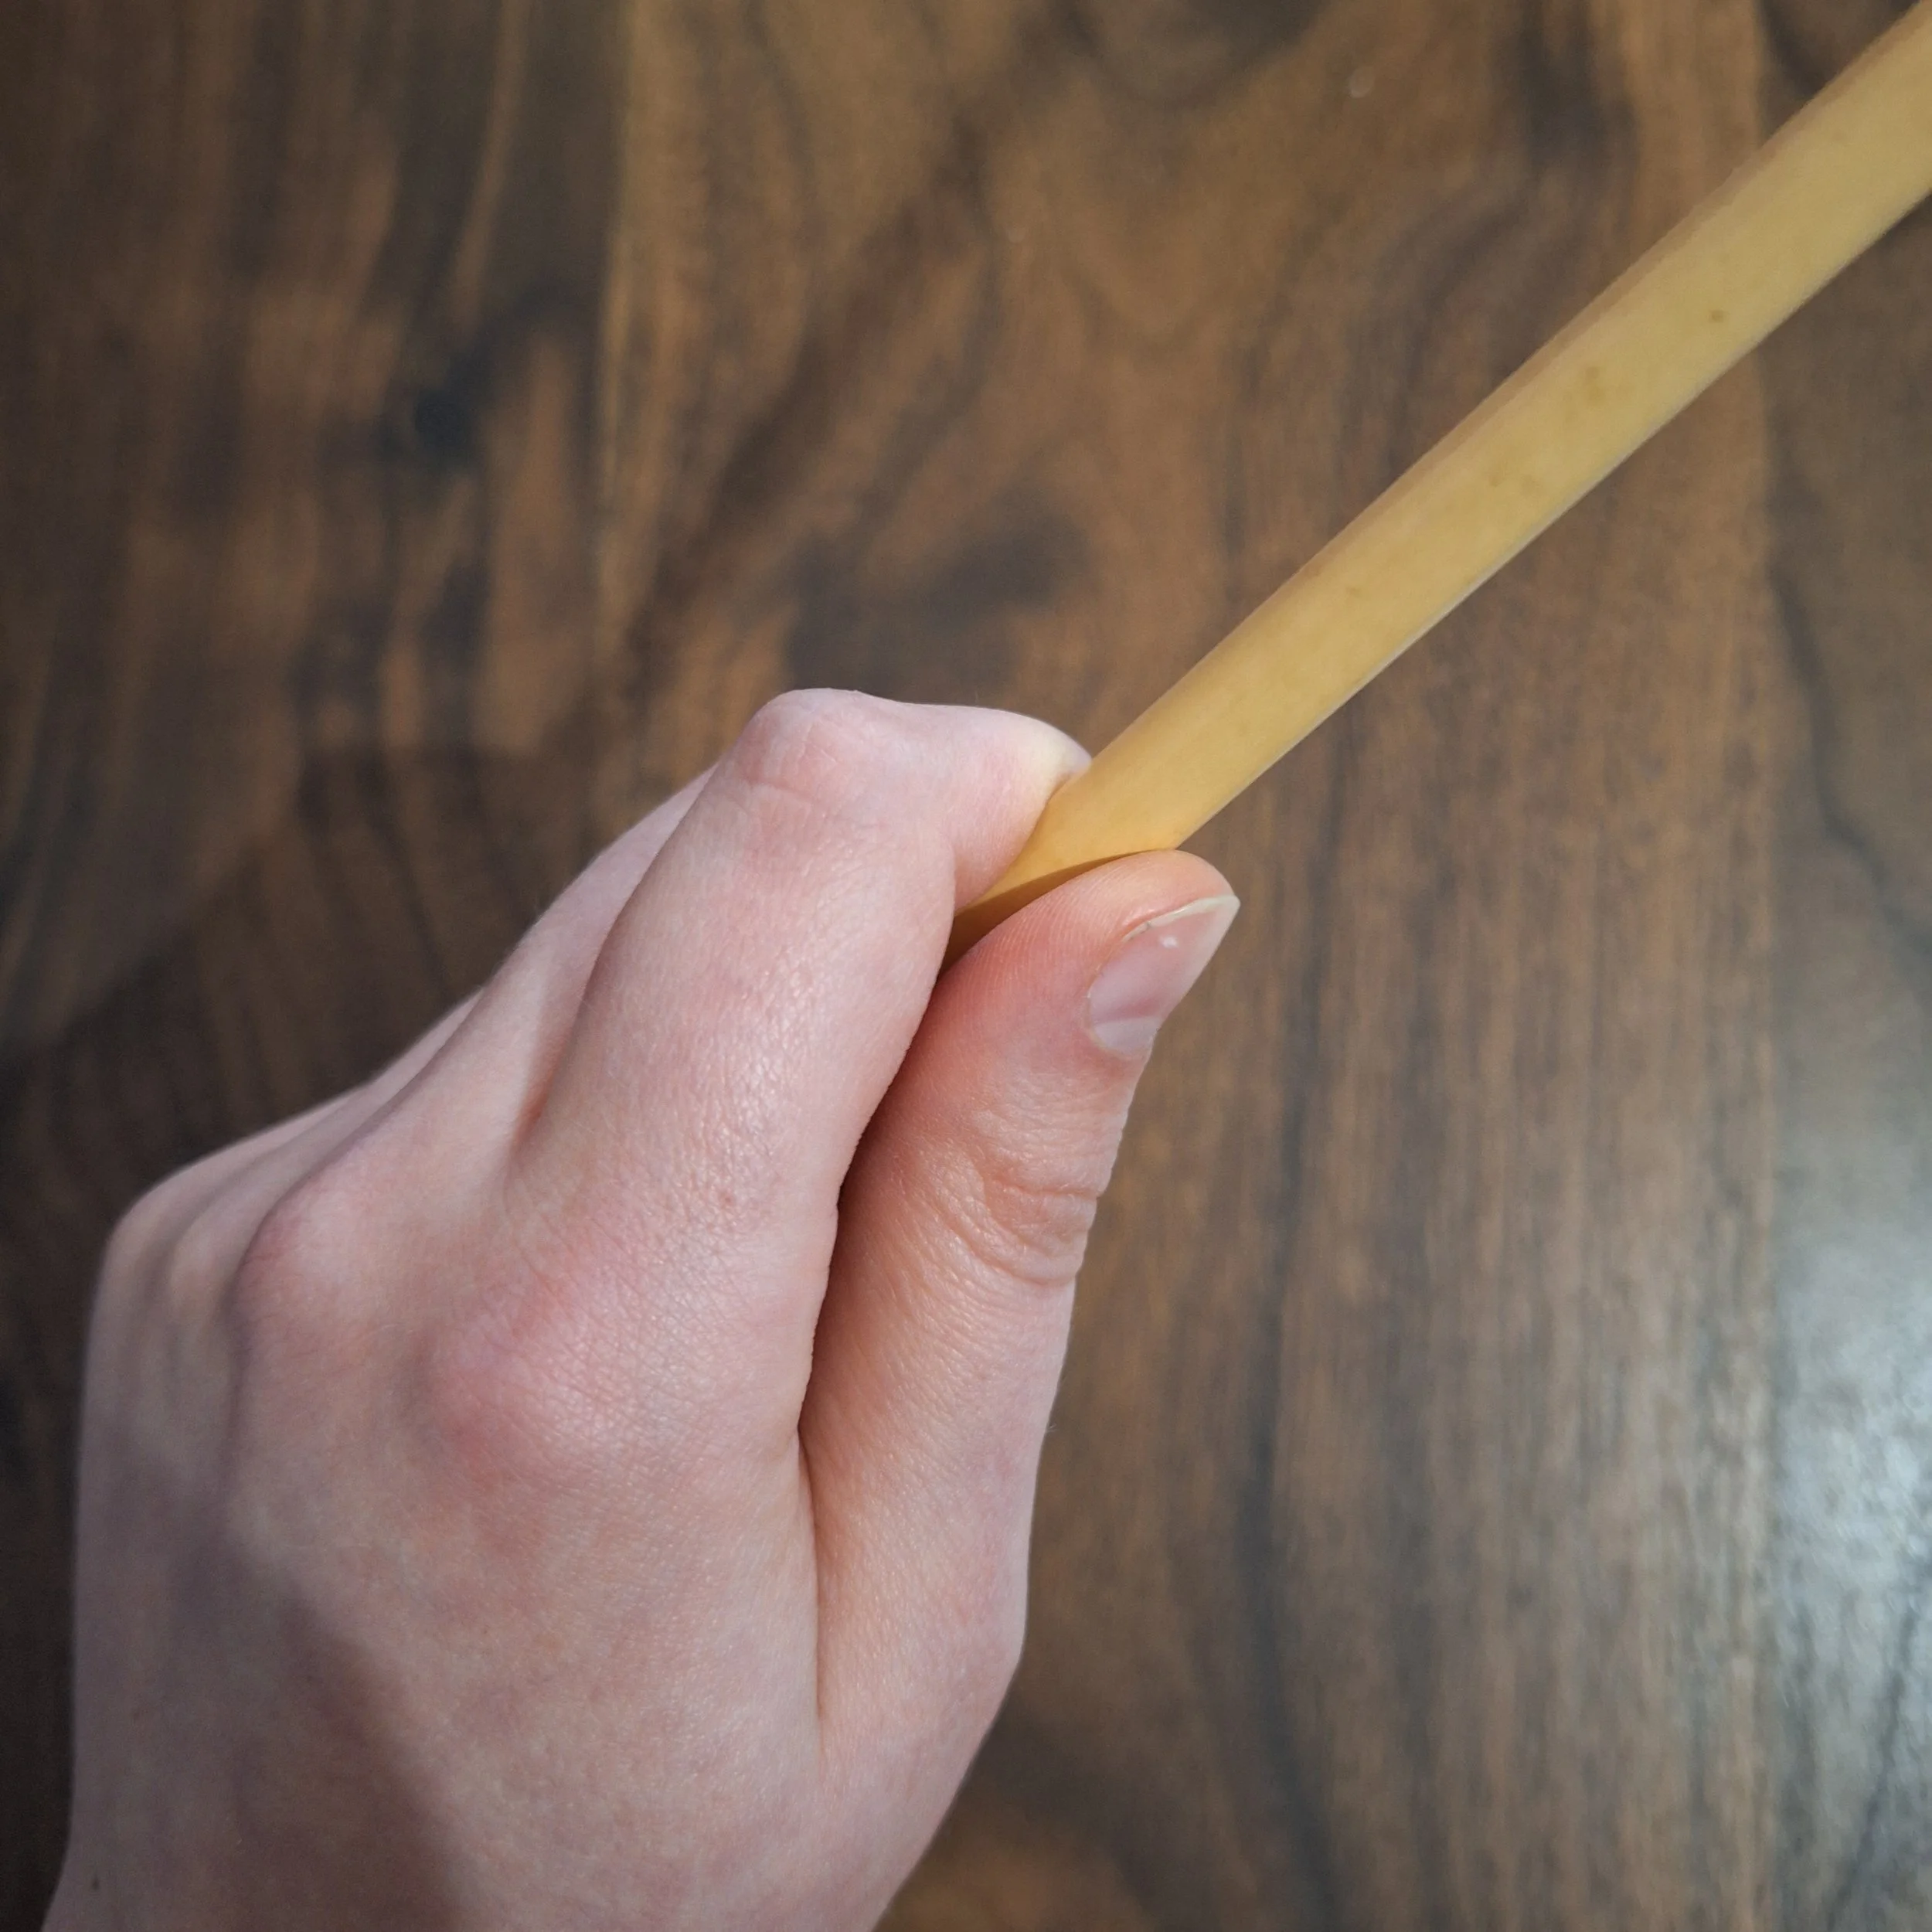
Close-up of fulcrum from above, showing slight gap between finger and thumb.
Stance and Posture
Lastly, let’s talk playing stand. Best practice is to stand at the approximate centre of the instrument with your feet shoulder width apart. You want to create a solid base from which you can lean/reach towards bars which are further away. The aim is also to limit your footwork
While in this stance it’s important to watch your posture. Try not to lock your knees as this will make it harder to move around. Also avoid sticking your neck forward like you’re a turtle. Percussion involves a lot of peripheral vision in order to strike the instrument with accuracy whilst simultaneously looking at your music and the conductor. Sticking your neck forward will limit your vision and create tension which may evolve into pain. Try and use your eyes actively.
Well, that’s all for today. Take care and happy playing!